 🛏️ FREE BED DRAWING
Bed Drawing for Kids How to Draw A Bed in 6 Easy Steps
Quick Answer
Draw a bed in six easy steps: a long low mattress, a tall headboard at one end, a soft pillow against it, a blanket over the top, and two short legs underneath. Color the blanket soft pink. Made for ages 3 and up — free printable, no signup needed.
At a Glance
- Subject: How to draw a bed
- Ages: 3+
- Steps: 6 steps
- Time: ~10 min
- Difficulty: Easy
- Supplies: Paper, crayons
A bed is the coziest drawing there is, and one of the easiest — it's just a tidy stack of rounded rectangles: mattress, headboard, pillow, blanket. If your child can draw a rectangle with soft corners, they can draw this snug little bed.
✏️ Draw Your Bed in 6 Easy Steps
One step per box — this step by step bed drawing shows each new part in a different color so kids can see exactly what changed.
Step 1: The Mattress
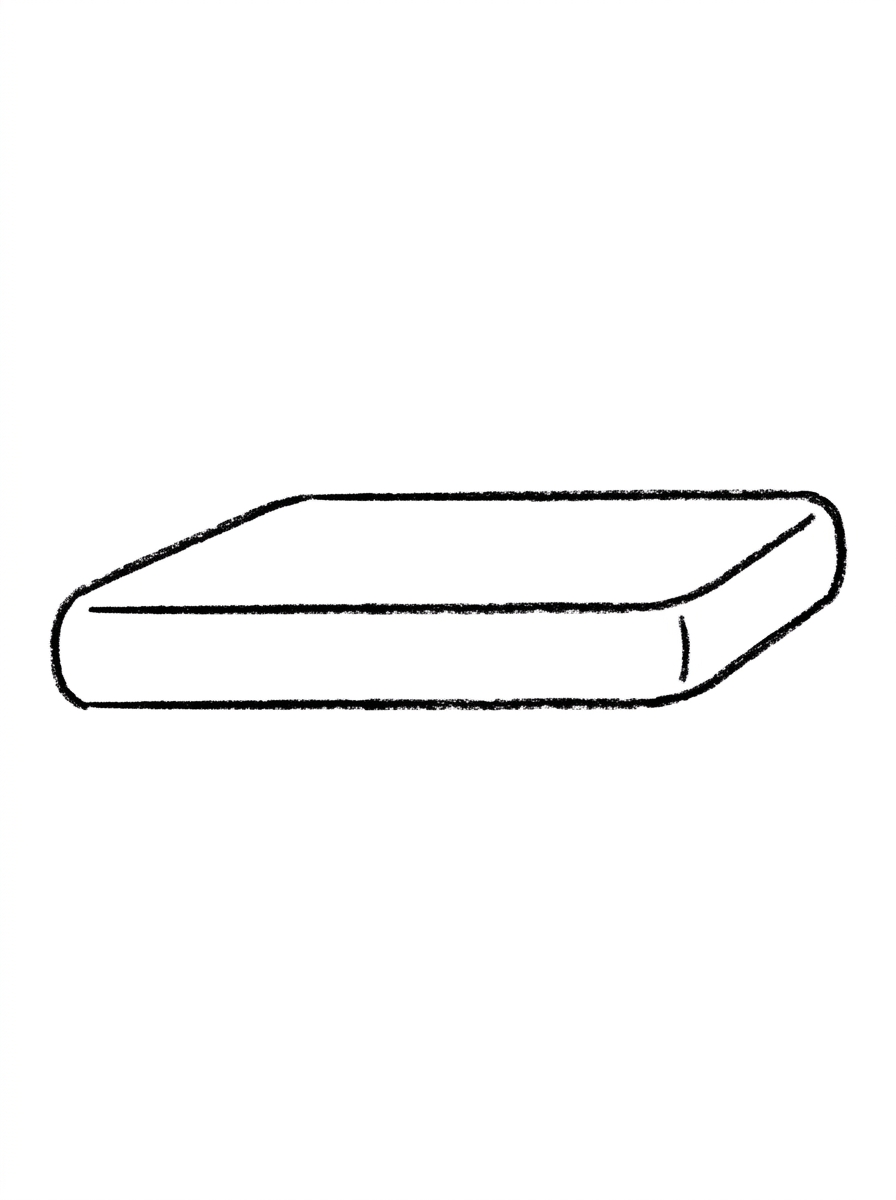
Draw one long, low rounded rectangle — that's the mattress.
Step 2: The Headboard
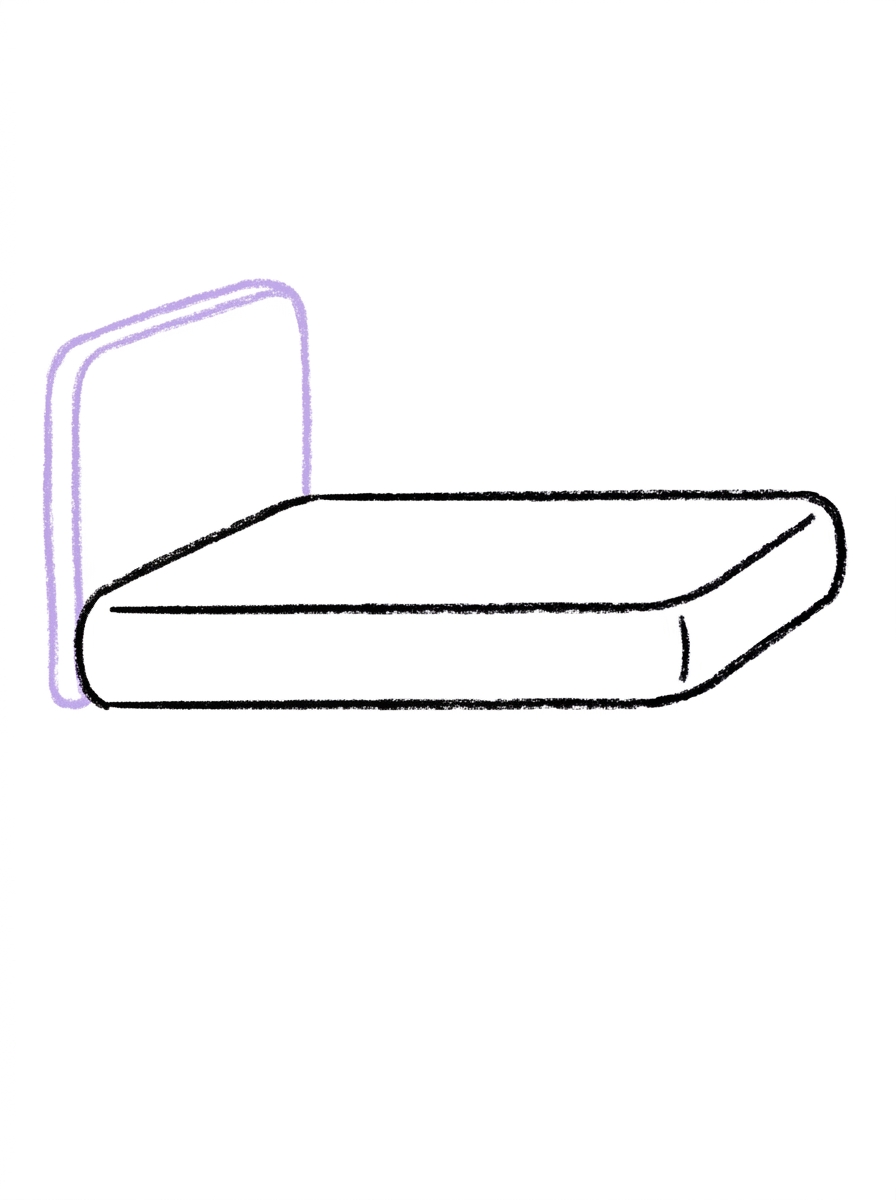
Add one tall rounded rectangle standing up at the left end of the mattress.
Step 3: The Pillow
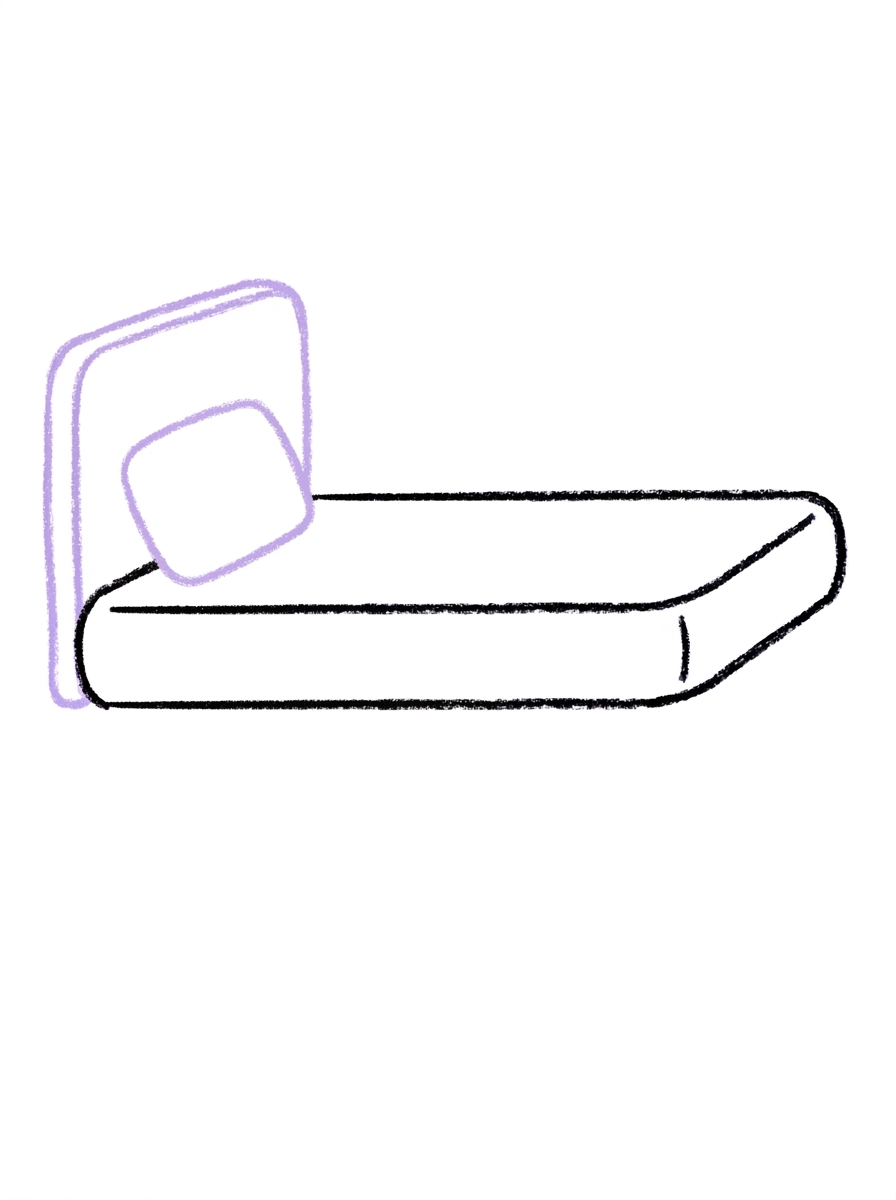
Draw one small rounded rectangle on top of the mattress, right against the headboard.
Step 4: The Blanket
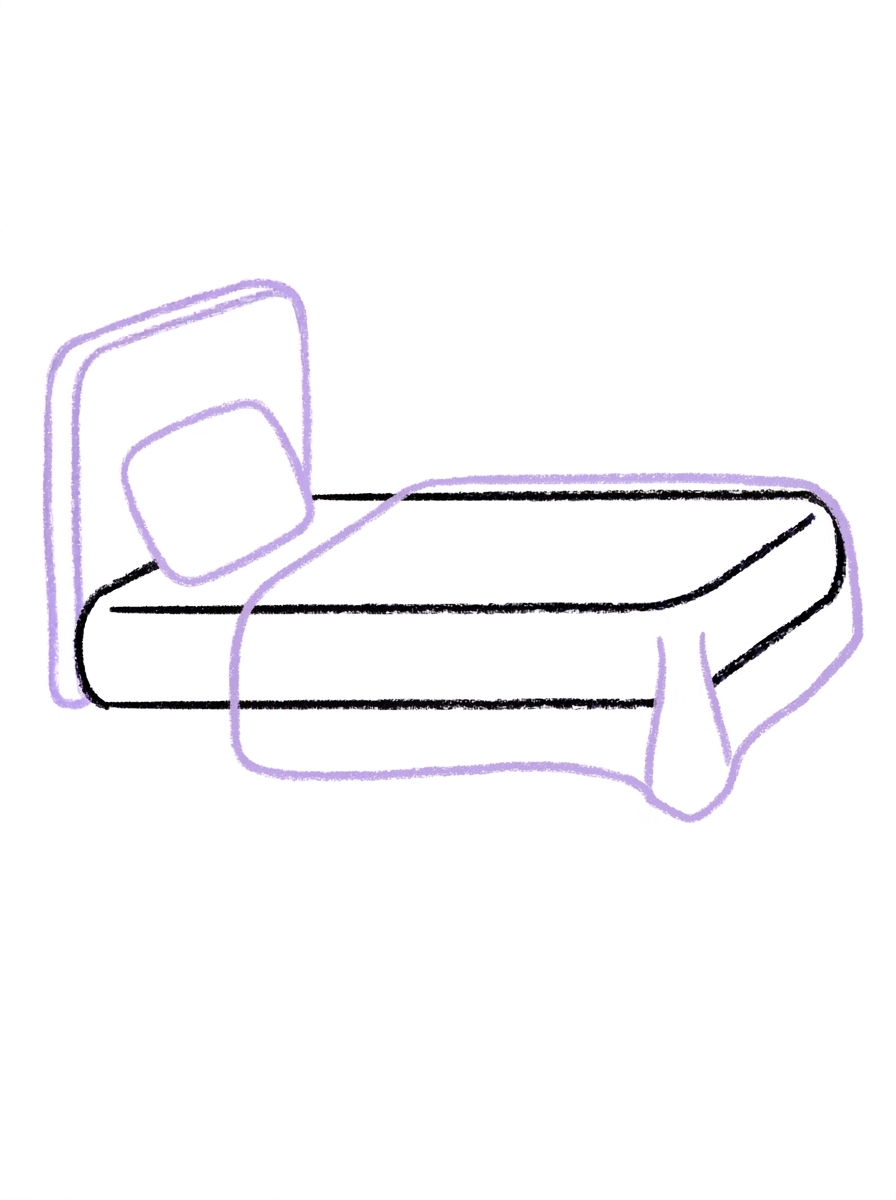
Draw the blanket over the rest of the mattress, hanging a little over the front edge.
Step 5: The Legs
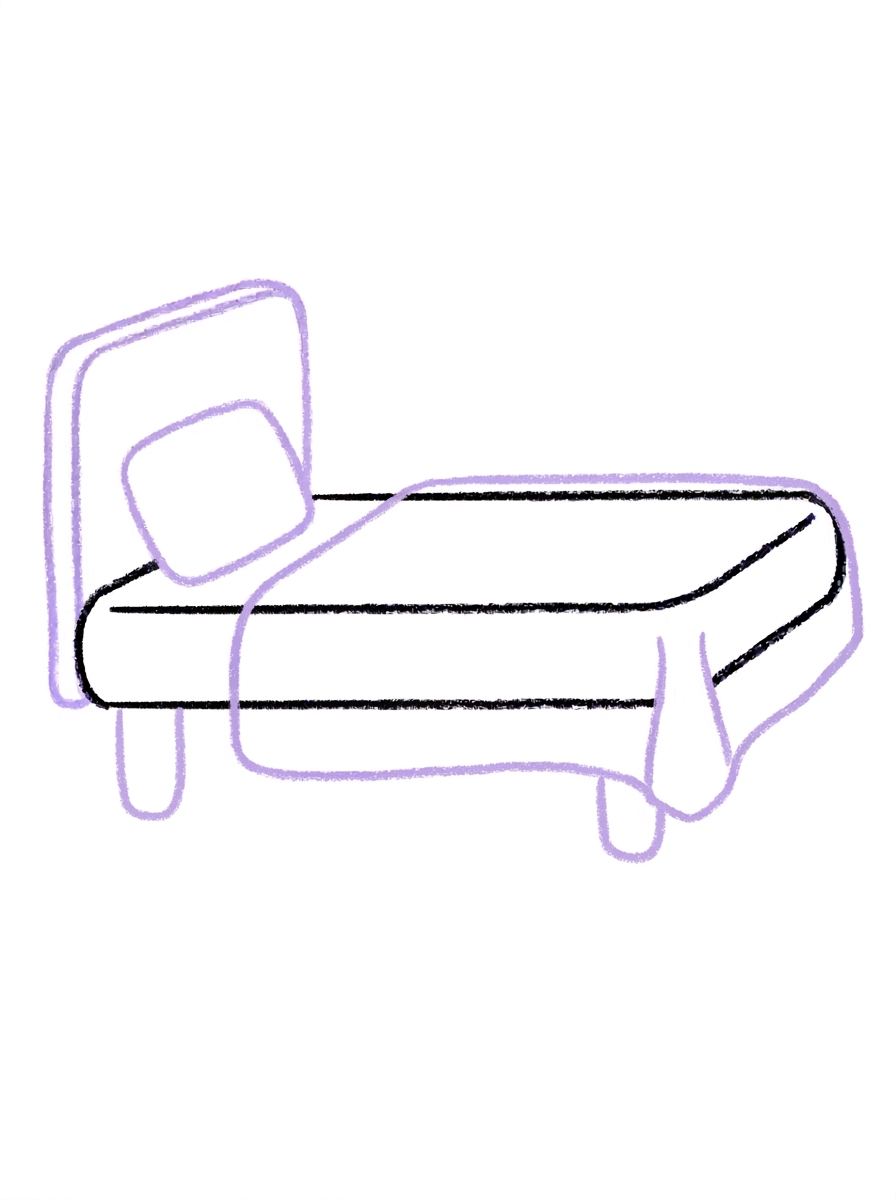
Add two short legs under the mattress, one near each end.
Step 6: Color It In
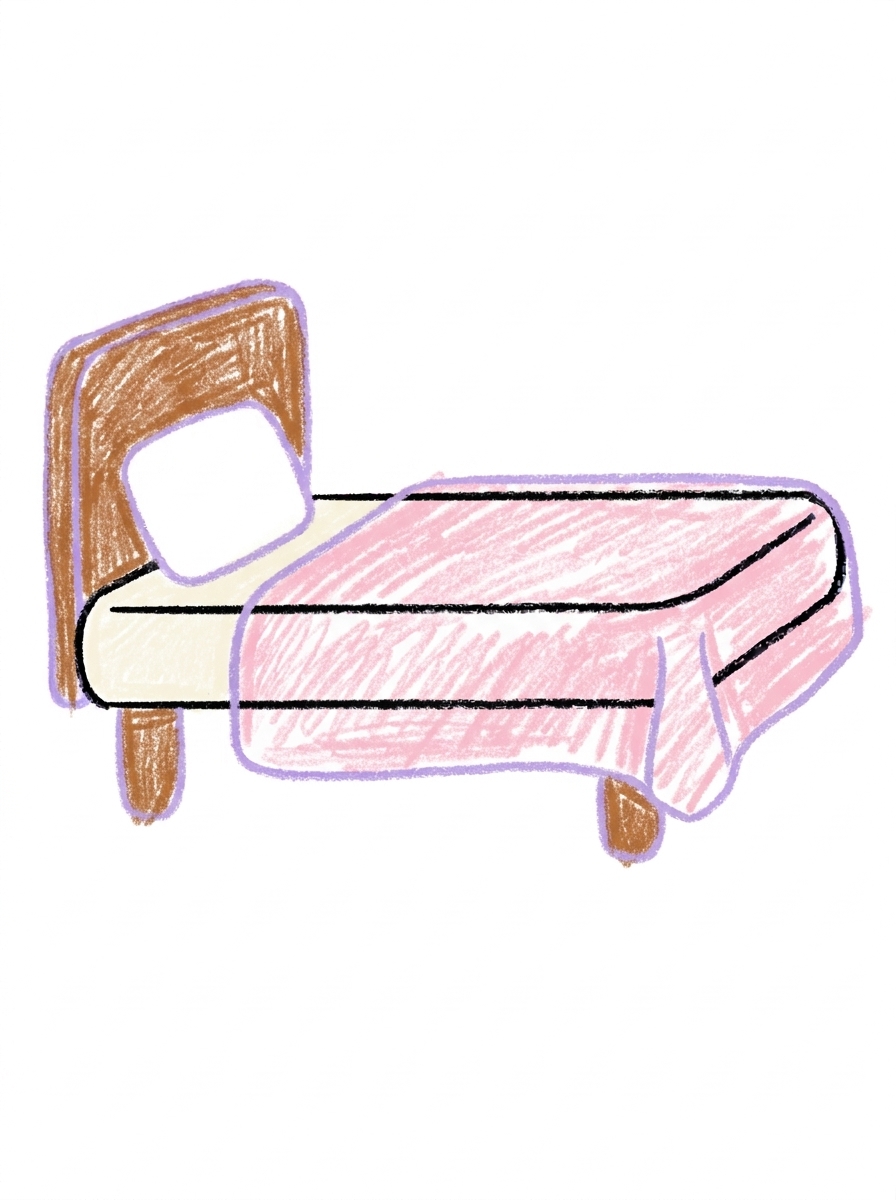
Color the headboard and legs warm wood brown, the mattress cream, the pillow white, and the blanket soft pink. Great drawing!
📊 Bed Drawing by Age
Every age can join in — just adjust the job.
| Age | What they can do | Tip |
|---|---|---|
| 3-4 | Draw the long low mattress and color the finished bed's blanket soft pink. | Draw the mattress long and low in the middle of the page — the headboard needs height on the left and the legs need room below. |
| 4-5 | Add the tall headboard, the small pillow tucked against it, and the blanket over the mattress. | The pillow sits on top of the mattress right against the headboard — that little stack is what makes it read as a bed. |
| 6+ | Finish all six steps, including placing the two short legs one near each end so the bed stands level. | Older kids can add a sleeping teddy on the pillow — one round head and two ear circles is plenty. |
🖨️ Download Your Free Bed Drawing Printable
The printable lays out all 6 steps one per box, big enough for little hands — kids draw right alongside each step.
⬇️ Open Free Printable 🖨️ Print🎁 Free printable for ages 3+
🛏️ Bed Dream Page
Turn your bed into a dream scene: draw a sleeping teddy or doll tucked under the blanket with just its head on the pillow, a crescent moon and stars in the corner of the page, and a rug underneath the bed, then decide together whose bed this is — a princess's, a pirate's, or your child's own dream bed with a slide instead of a ladder. Write one sentence about the dream under the drawing (or dictate it for a grown-up to write) and it becomes a bedtime story page.
What You'll Need to Draw A Bed
All you need is a pencil, an eraser, and crayons or markers. For the colors in the tutorial, have warm wood brown ready for the headboard and legs, cream for the mattress, white for the pillow, and soft pink for the blanket. Regular printer paper or a sketchbook both work.
What They're Learning
This tutorial practices rounded rectangles in four sizes — long and low (mattress), tall (headboard), small (pillow), and short (legs) — great shape-control practice. Kids also work on stacking and layering, drawing one shape resting against another, the drape of an overhanging edge, and simple left-to-right sequencing from headboard to foot.
Make It Yours
Try a bunk bed by stacking a second mattress, pillow, and blanket above the first, a royal bed with a heart or star drawn on the headboard, a camping version with a sleeping bag instead of a blanket, or a pet bed drawn tiny beside it for a favorite stuffed animal. A bedtime scene with a moon in the corner makes a sweet goodnight card.
🛒 Our Favorite Drawing Supplies
These are the supplies we reach for in our own home — washable (because kids), quality paper, and enough colors to avoid fights.
As an Amazon Associate, MomYouNeedThis earns from qualifying purchases — at no extra cost to you.
💡 Bed Drawing Tips for Parents
Step 4's blanket overhang is the detail that makes the whole drawing work, and it's the one kids skip. Show them the picture first: the blanket's front edge drops a little below the mattress's front edge. One finger's width of overhang is plenty — more than that and the blanket starts eating the legs in step 5.
Keep the two legs in step 5 the same length and tucked one near each end of the mattress. If a leg lands in the middle, the bed looks like it might tip; if the legs are different lengths, kids often notice before you do and enjoy fixing it themselves.
✏️ Bed Drawing Step by Step
A bed is the coziest possible drawing subject, and one of the easiest: it's a stack of rectangles. This tutorial draws the bed from the side, the way kids see their own bed when they walk into their room, so every piece stacks in a place that makes sense.
The long, low mattress goes down first and carries everything: the headboard stands at its left end, the pillow rests against the headboard, the blanket covers the rest, and the legs hold the whole thing up from underneath. There is no perspective to learn and no tricky angle anywhere.
Work through the steps in order and let your child check each one against the picture before moving on. That checking habit — draw, compare, continue — is the real skill underneath every drawing tutorial, and a bed's tidy stack makes it easy to practice.
See free bed printable for more.
✏️ One Shape Per Step, Six Steps Total
The order follows how a real bed is made: step 1, one long, low rounded rectangle mattress; step 2, one tall rounded rectangle headboard standing up at the left end; step 3, one small rounded rectangle pillow on top of the mattress, right against the headboard.
Step 4 drapes the blanket over the rest of the mattress, hanging a little over the front edge — that small overhang is doing a lot of work, because it's what separates 'blanket' from 'more mattress.' Step 5 adds two short legs under the mattress, one near each end.
Step 6 colors the headboard and legs warm wood brown, the mattress cream, the pillow white, and the blanket soft pink. Rectangles with soft corners are the whole game here, so wobbly lines are not a problem — a hand-drawn bed just looks extra cozy.
See free bed printable for more.
🛏️ Cozy Bed Drawing
What makes this a cozy bed drawing instead of a furniture diagram? The soft corners and the blanket. Every rectangle is rounded, the pillow is plump against the headboard, and the blanket hangs over the edge the way a real tucked-in blanket does. Square and flat reads 'table'; rounded and draped reads 'bedtime.'
You can push the coziness further at coloring time: polka dots or stars on the blanket, stripes on the pillow, or a heart on the headboard. A bunk version also works — repeat the mattress, pillow, and blanket stack a second time above the first, sharing the same headboard.
A bed is a lovely calm-down drawing before sleep, and kids enjoy drawing the bed they wish they had. This one can hold a teddy, a stack of storybooks, and a whole night of dreams without anyone feeling the picture is 'wrong.'
See free bed printable for more.
❓ Bed Drawing FAQs
What is the easiest way to draw a bed?
Start with one long, low rounded rectangle for the mattress, then stack the pieces on it: a tall headboard at the left end, a small pillow against the headboard, a blanket over the rest, and two short legs underneath. The six steps turn bedtime furniture into rectangles your child already knows.
What age is this bed drawing for?
It's made for ages 3 and up. Every shape is a rectangle with soft corners — the friendliest shape there is — and younger kids can do the mattress and coloring while older kids add the pillow, blanket drape, and legs themselves.
What supplies do we need?
A pencil, an eraser, paper, and crayons or markers. For colors you'll want warm wood brown for the headboard and legs, cream for the mattress, white for the pillow, and soft pink for the blanket.
Is the printable really free?
Yes — every printable on MomYouNeedThis is 100% free, including this bed drawing tutorial. There is no signup, no email, and no catch — just download, print, and draw.
How do I print it?
Open the PDF and choose Print, then set the scale to 100% (sometimes called Actual Size) so the steps print at full size. The tutorial is designed for regular US Letter paper, and plain printer paper works perfectly.
Which end does the headboard go on?
The headboard is one tall rounded rectangle standing up at the left end of the mattress. Left is simply where this bed's pillow end is — draw it tall enough to peek well above the mattress line, and the whole drawing instantly reads as a bed instead of a table.
How do I make the blanket look real?
Draw the blanket over the rest of the mattress, past the pillow, and let its front edge hang a little over the side of the mattress. That small overhang is the detail that makes the blanket look soft and tucked-in rather than painted on.
How many legs does the bed have?
Just two — one short leg under the mattress near each end. Because the bed is drawn from the side, only the two near legs show, and keeping them the same length keeps the bed standing level.
📚 Keep Exploring
- ✏️ All 74 Drawing Tutorials 74 free step-by-step drawing tutorials for kids.
- 🎀 Cute Coloring Free cute coloring pages for kids.
- ✏️ Drawing Practice Free printable drawing pre-writing worksheet for toddlers.