 🦋 FREE BUTTERFLY DRAWING
Butterfly Drawing for Kids How to Draw A Butterfly in 6 Easy Steps
Quick Answer
Draw a butterfly in six easy steps: a slim oval body, two big top wings, two smaller bottom wings, two antennae with circle tips, four wing spots, then color. Top wings violet purple, bottom wings pink. Made for ages 3 and up, free, with no signup needed.
At a Glance
- Subject: How to draw a butterfly
- Ages: 3+
- Steps: 6 steps
- Time: ~15 min
- Difficulty: Easy
- Supplies: Paper, crayons
A butterfly is really just a skinny oval wearing four big oval wings — and this tutorial keeps the body slim on purpose, so the wings get to be the stars. Add curvy antennae and one spot in every wing, and it looks ready to flutter off the page.
✏️ Draw Your Butterfly in 6 Easy Steps
One step per box — this step by step butterfly drawing shows each new part in a different color so kids can see exactly what changed.
Step 1: The Body
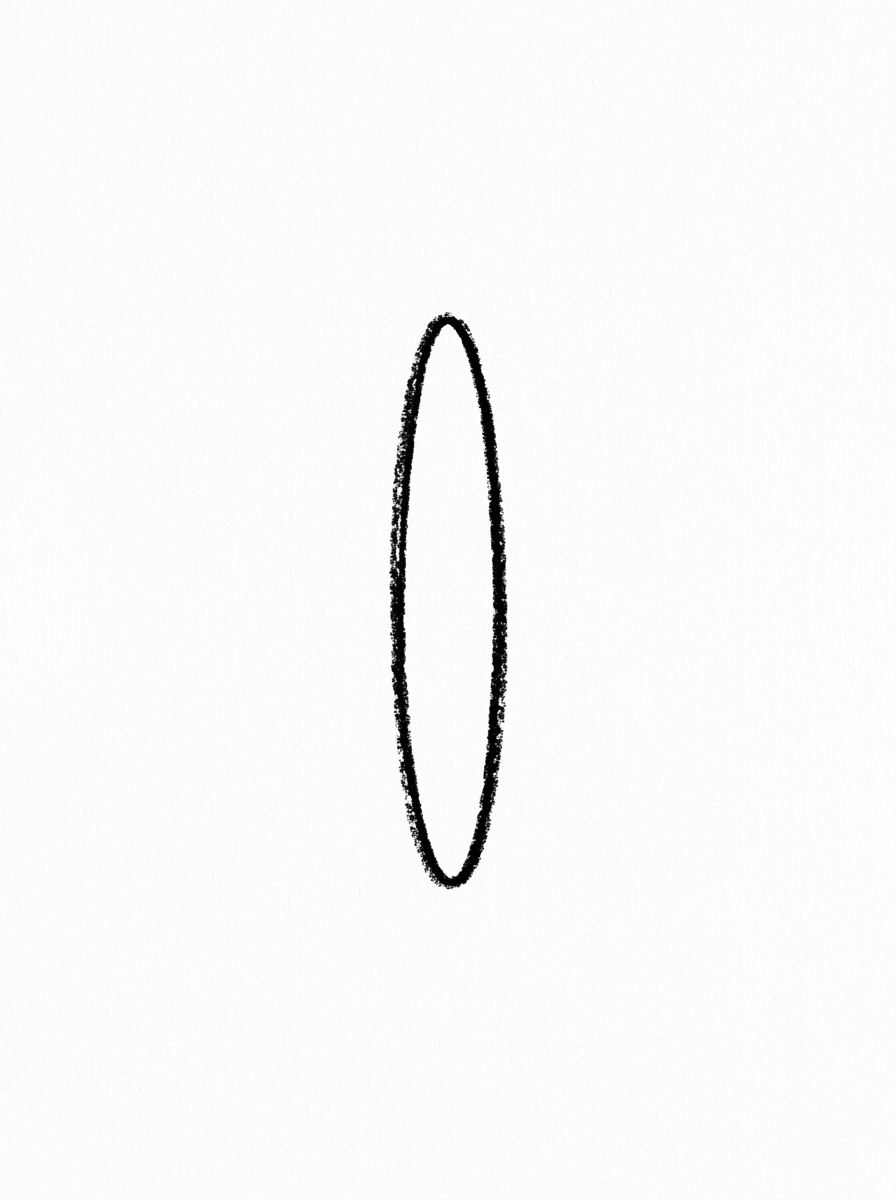
Draw one slim oval standing straight up in the middle of the page — like a finger. That is the butterfly's body. Keep it small: the wings will be much bigger!
Step 2: The Top Wings
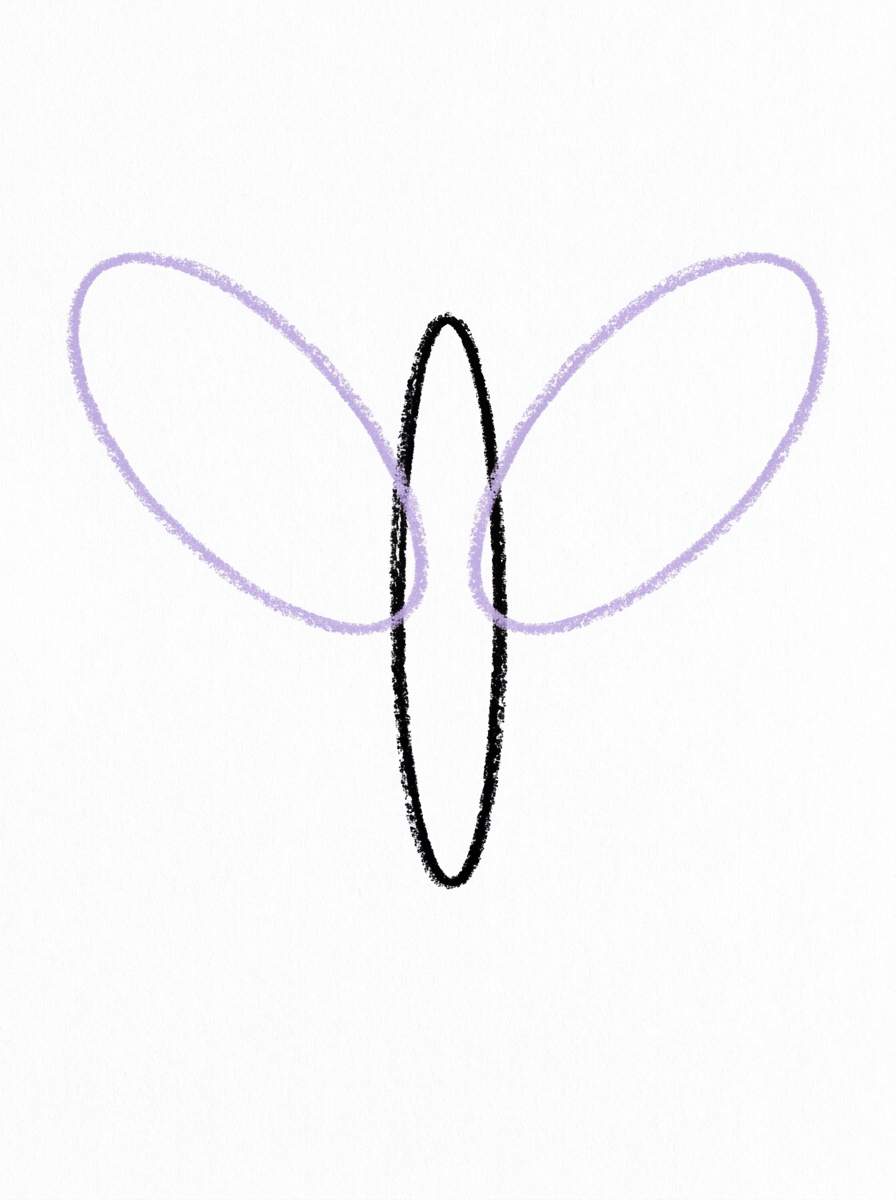
Draw one big oval wing on each side of the top of the body, both the same size.
Step 3: The Bottom Wings
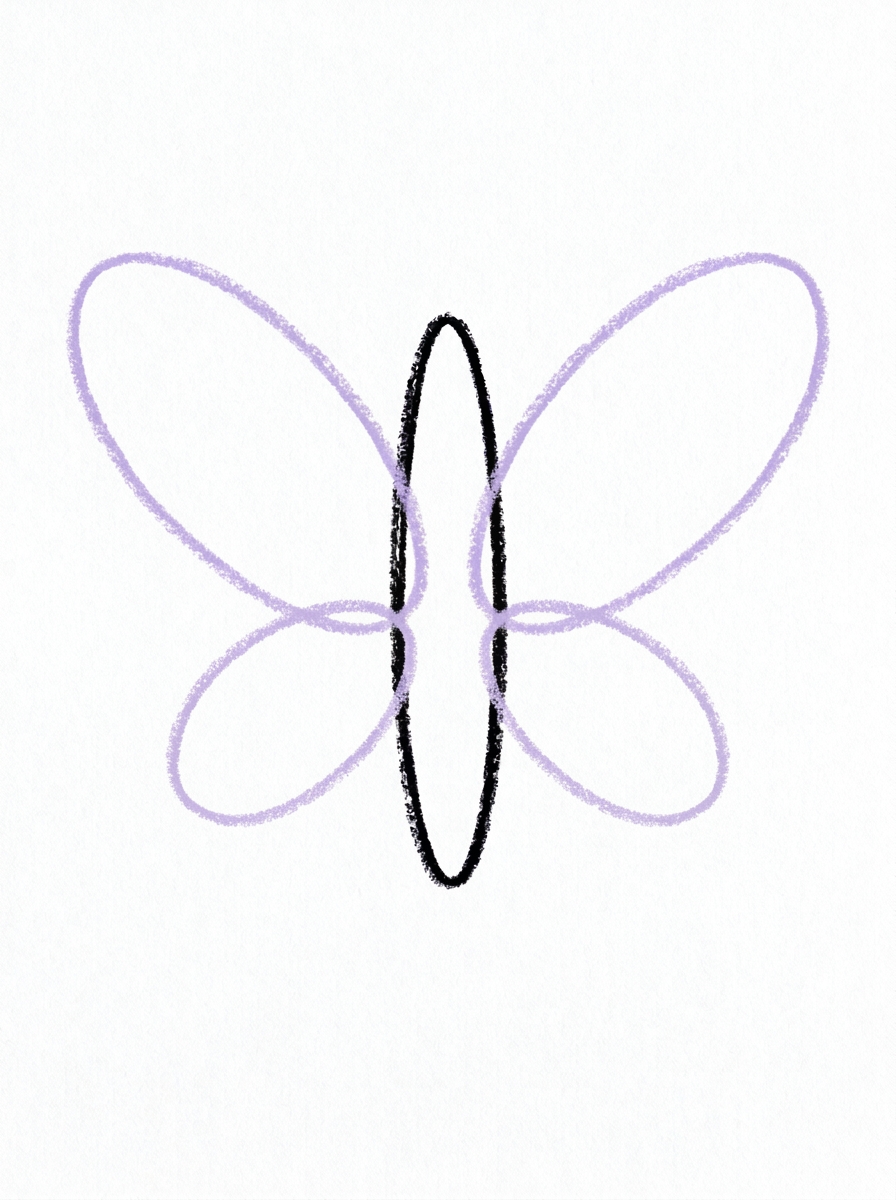
Draw one smaller oval wing on each side of the bottom of the body.
Step 4: The Antennae
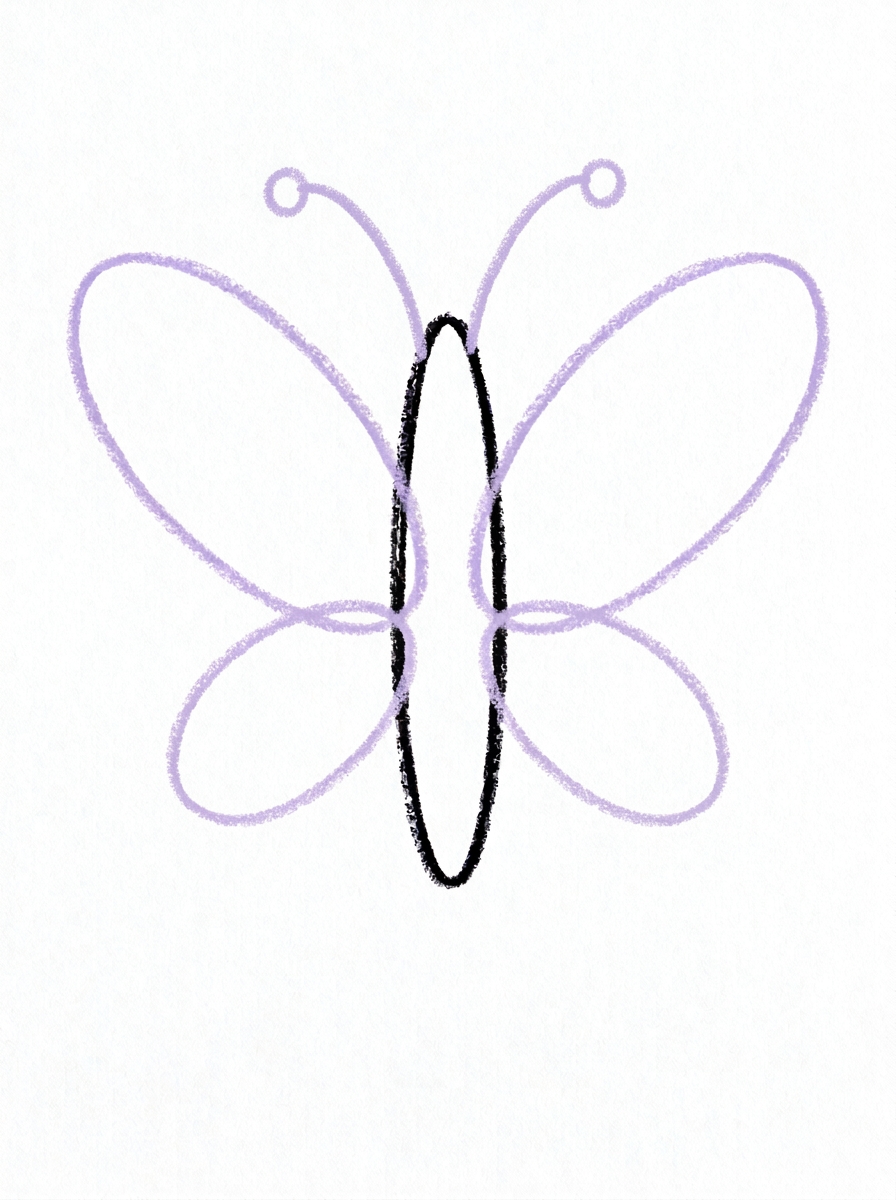
Draw two curvy lines coming out of the top of the body, with a little circle at the end of each one.
Step 5: The Wing Spots
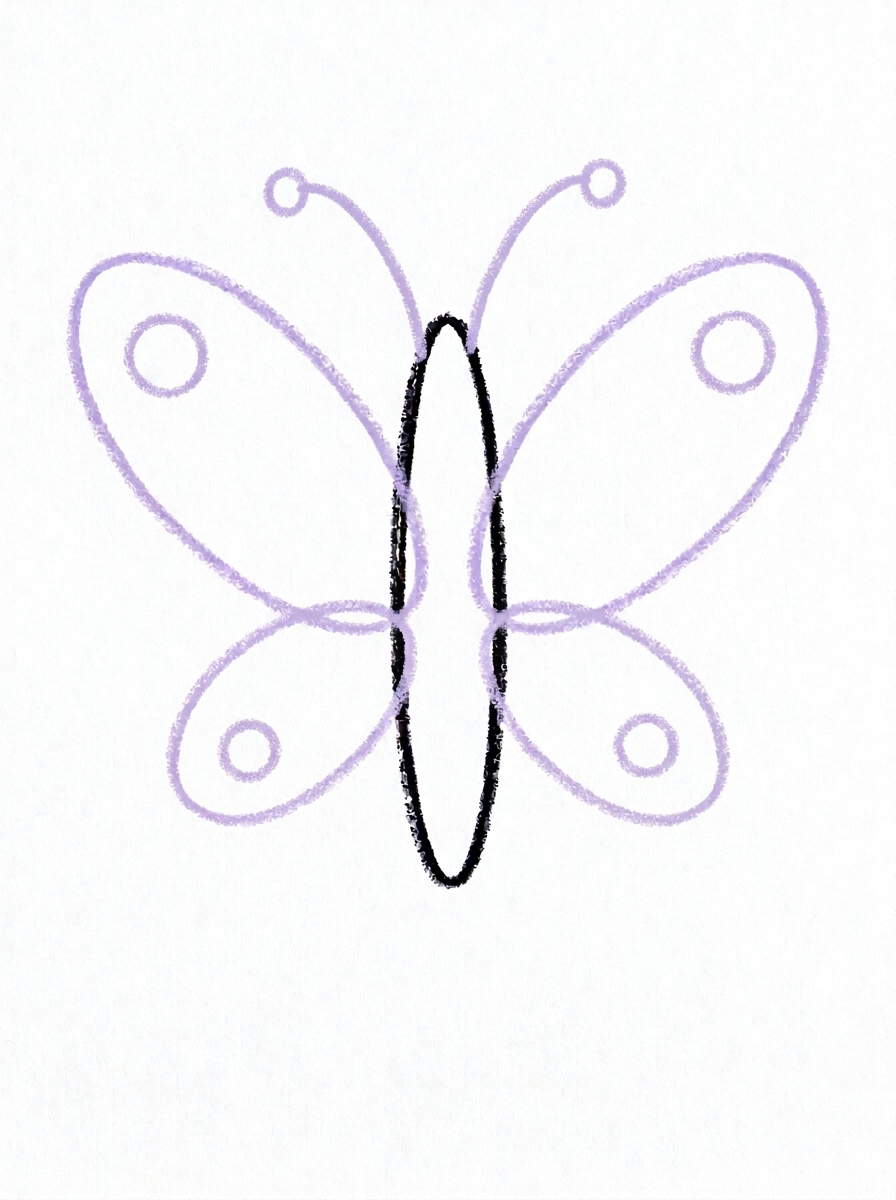
Draw one circle spot inside each wing — four spots in all.
Step 6: Color It In
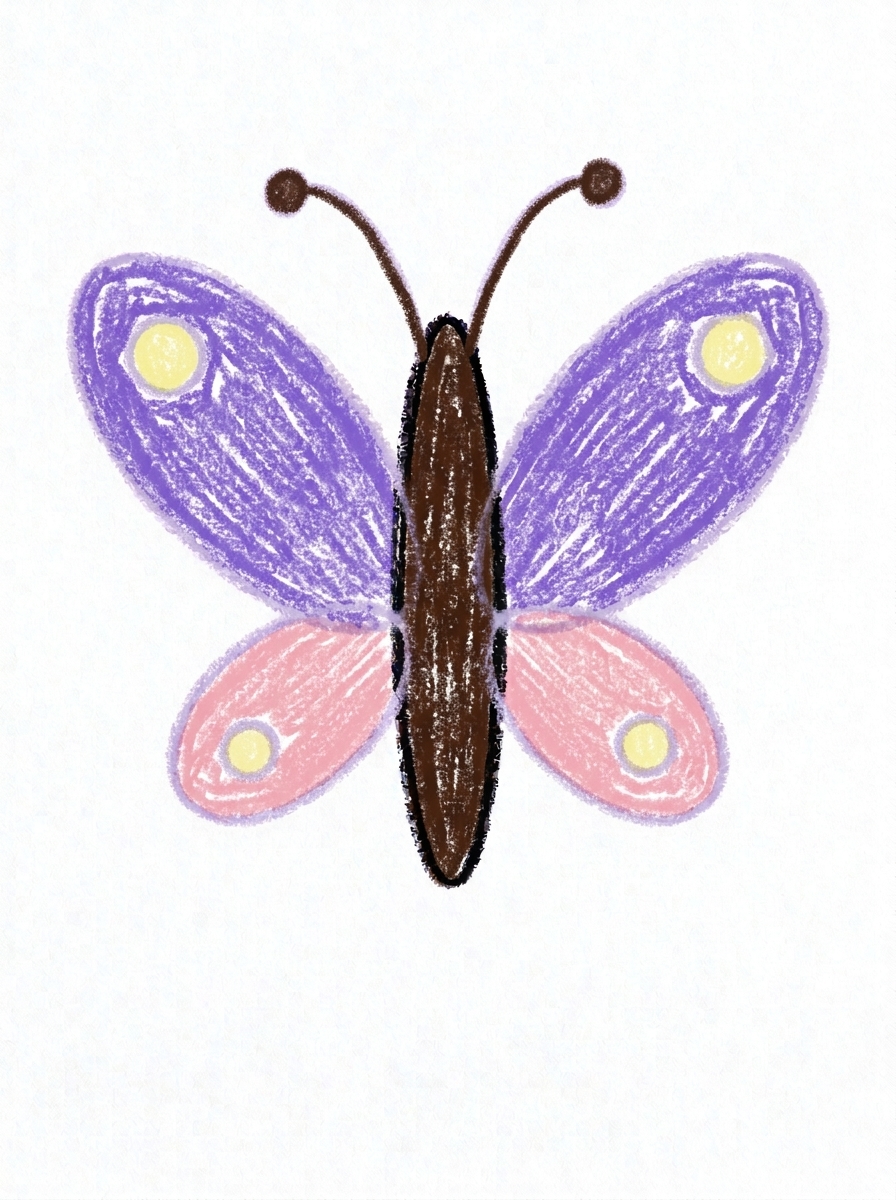
Color the top wings violet purple and the bottom wings soft pink. Make the spots pale yellow, and the body and antennae dark brown.
📊 Butterfly Drawing by Age
Every age can join in — just adjust the job.
| Age | What they can do | Tip |
|---|---|---|
| 3-4 | Draw the slim body and color the big wings — violet purple on top, soft pink on the bottom. | Draw the body small and in the middle of the page; the wings need lots of room on both sides, and that one setup choice matters most. |
| 4-5 | Add both top wings and both bottom wings, working left then right so the pairs match. | After each wing, ask 'where does its twin go?' — matching pairs is the whole game with butterflies. |
| 6+ | Finish all six steps, including the antennae with their circle tips and one spot inside each wing. | Older kids can invent their own wing patterns — extra spots, stripes, or dots — as long as both sides match. |
🖨️ Download Your Free Butterfly Drawing Printable
The printable lays out all 6 steps one per box, big enough for little hands — kids draw right alongside each step.
⬇️ Open Free Printable 🖨️ Print🎁 Free printable for ages 3+
🦋 Butterfly Garden Page
Give your butterfly somewhere to go: draw a garden under it with tall flowers, grass, and a sun, and show the butterfly visiting its favorite flower. Name your butterfly and write its name under the drawing (or dictate it for a grown-up to write). For an extra challenge, draw a second, smaller butterfly with the same steps and different colors — every garden needs a friend.
What You'll Need to Draw A Butterfly
All you need is a pencil, an eraser, and crayons or markers. For the colors in the tutorial, have violet purple ready for the two top wings, soft pink for the two bottom wings, pale yellow for the four spots, and dark brown for the body and antennae. Regular printer paper or a sketchbook both work.
What They're Learning
This tutorial practices ovals in two sizes (big top wings, smaller bottom wings, one slim body), matching pairs and early symmetry — every part on the left has a twin on the right — plus counting to four (four wings, four spots) and two (two antennae). The curvy antennae lines and circle tips add gentle fine-motor control work.
Make It Yours
Try a monarch-style butterfly in orange with black edges, a rainbow butterfly with different colors on all four wings, a baby butterfly drawn smaller with extra-big wings, or a patterned butterfly with stripes and extra dots — just keep both sides matching. Two butterflies over a row of flowers makes a lovely spring card.
🛒 Our Favorite Drawing Supplies
These are the supplies we reach for in our own home — washable (because kids), quality paper, and enough colors to avoid fights.
As an Amazon Associate, MomYouNeedThis earns from qualifying purchases — at no extra cost to you.
💡 Butterfly Drawing Tips for Parents
Step 1 decides the whole drawing: if the body goes down fat, the wings end up small and the butterfly reads as a beetle. Draw it slim — about a finger's width — and right in the middle of the page so both wing pairs have room. If your child draws it big anyway, just roll with it and make the wings even bigger.
Matching wings in steps 2 and 3 is the other make-or-break moment. Have your child draw the left wing, stop, and find where its twin starts before drawing it. The antennae in step 4 curve away from each other like a letter V with wiggles; if they cross or lean the same way, a quick erase and redo is worth it. Spots are forgiving — one per wing, anywhere inside.
✏️ Butterfly Drawing Step by Step
A butterfly is one of the best subjects for teaching symmetry without ever using the word: everything on the left has a twin on the right, and kids can see immediately when a pair matches. This tutorial leans into that — it is built as a series of pairs.
The one unusual choice is the body. It is deliberately slim, like a finger, because the number one way kids' butterflies go wrong is a fat body with little wings stuck on it. A thin body forces the wings to be the big, beautiful part, which is what a butterfly is.
Work through the steps in order, drawing each pair of wings together — left, then right — before moving down to the next pair. That rhythm (draw one, match it) is the real skill this page practices.
See free butterfly printable for more.
✏️ Two Wings Up, Two Wings Down
Step 1 is the slim oval body standing in the middle of the page. Step 2 adds the two big top wings, one on each side of the body's top, both the same size. Step 3 adds the two smaller bottom wings below them — smaller is important; it's the size change that gives a butterfly its classic shape.
Step 4 curves two antennae out of the top of the body, each ending in a little circle. Step 5 puts exactly one circle spot inside each wing — four wings, four spots — which keeps the decoration balanced instead of random.
Step 6 colors by pairs too: top wings violet purple, bottom wings soft pink, all four spots pale yellow, and the body and antennae dark brown. Because the coloring follows the same pair logic as the drawing, even the coloring step teaches the matching habit.
See free butterfly printable for more.
🦋 Cute Butterfly Drawing
What makes this butterfly cute is proportion: a skinny body, oversized wings, and round spots. Roundness reads friendly to young kids, and every shape here is an oval or a circle — there is not a single sharp corner in the whole drawing.
The antennae do a lot of work for two little lines. Their circle tips echo the wing spots and give the butterfly a face-like top, even though there's no face at all — kids read those two dots as eyes all the time, and that's fine.
Because the structure is so simple, the butterfly becomes a decoration platform: once a child trusts the six steps, the spots turn into stripes, hearts, or rainbow bands. That experimenting is exactly what the plain version is for.
See free butterfly printable for more.
❓ Butterfly Drawing FAQs
What is the easiest way to draw a butterfly?
Start with one slim oval body standing straight up, then add two big oval wings at the top, two smaller oval wings at the bottom, two antennae with circle tips, and one spot inside each wing.
What age is this butterfly drawing for?
It's made for ages 3 and up. The shapes are all preschool-friendly — ovals, curvy lines, and circles — and younger kids can do the body and coloring while older kids add the antennae and spots themselves.
What supplies do we need?
A pencil, an eraser, paper, and crayons or markers. For colors you'll want violet purple for the top wings, soft pink for the bottom wings, pale yellow for the spots, and dark brown for the body and antennae.
Is the printable really free?
Yes — every printable on MomYouNeedThis is 100% free, including this butterfly drawing tutorial. There is no signup, no email, and no catch — just download, print, and draw.
How do I print it?
Open the PDF and choose Print, then set the scale to 100% (sometimes called Actual Size) so the steps print at full size. The tutorial is designed for regular US Letter paper, and plain printer paper works perfectly.
Why is the butterfly's body so small?
Because on a real butterfly the wings do all the flying and showing off — the body is just the slim middle bit that holds them together. Keeping it finger-thin is what makes the finished drawing look like a butterfly instead of a bug.
How do I make both wings the same?
Draw the wings in matching pairs: draw one, then immediately draw its twin on the other side of the body at the same height and the same size. Little differences are fine — real butterflies wobble too.
Can my butterfly be a different color?
Absolutely — try monarch orange and black, a rainbow butterfly with a different color on every wing, or matching pinks and purples. Just keep the plan simple: top wings one color, bottom wings another, spots a third.
📚 Keep Exploring
- ✏️ All 74 Drawing Tutorials 74 free step-by-step drawing tutorials for kids.
- 🐾 Animal Coloring Free animal coloring pages for kids.
- ✏️ Drawing Practice Free printable drawing pre-writing worksheet for toddlers.