 🦀 FREE CRAB DRAWING
Crab Drawing for Kids How to Draw A Crab in 6 Easy Steps
Quick Answer
Draw a crab in six easy steps: a wide oval body, two big claws with notches, dot eyes on top, then four pointy legs on the left and four on the right. Color everything bright red-orange. Made for ages 3 and up — free printable, no signup needed, just print and draw.
At a Glance
- Subject: How to draw a crab
- Ages: 3+
- Steps: 6 steps
- Time: ~15 min
- Difficulty: Easy
- Supplies: Paper, crayons
Crabs look like a lot of legs and claws, but this one is secretly simple — it's built from one wide oval, two big circles, and pointy legs you can count as you draw. If your child can draw an oval and a zigzag, they can draw this cheerful crab.
✏️ Draw Your Crab in 6 Easy Steps
One step per box — this step by step crab drawing shows each new part in a different color so kids can see exactly what changed.
Step 1: The Body
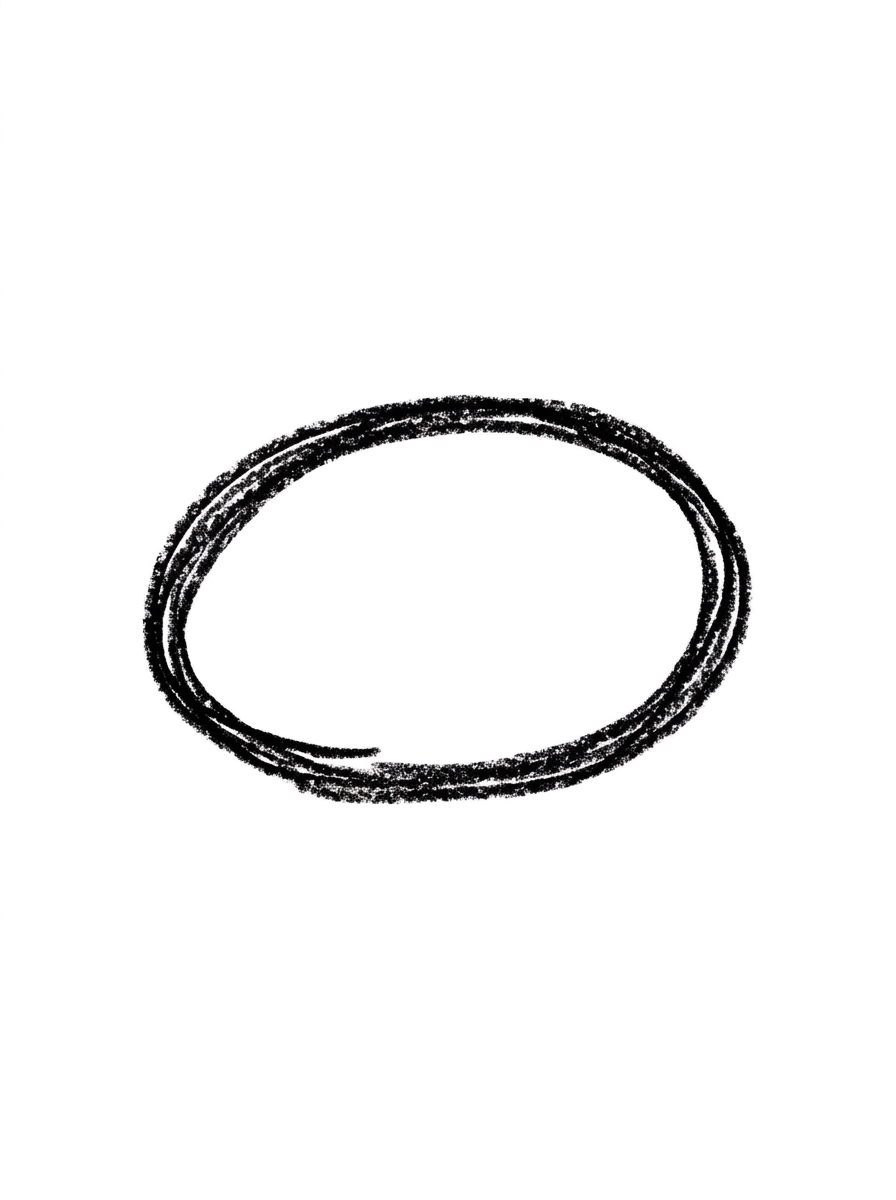
Draw one wide oval, a little flatter on the bottom. That is the crab's body.
Step 2: The Claws
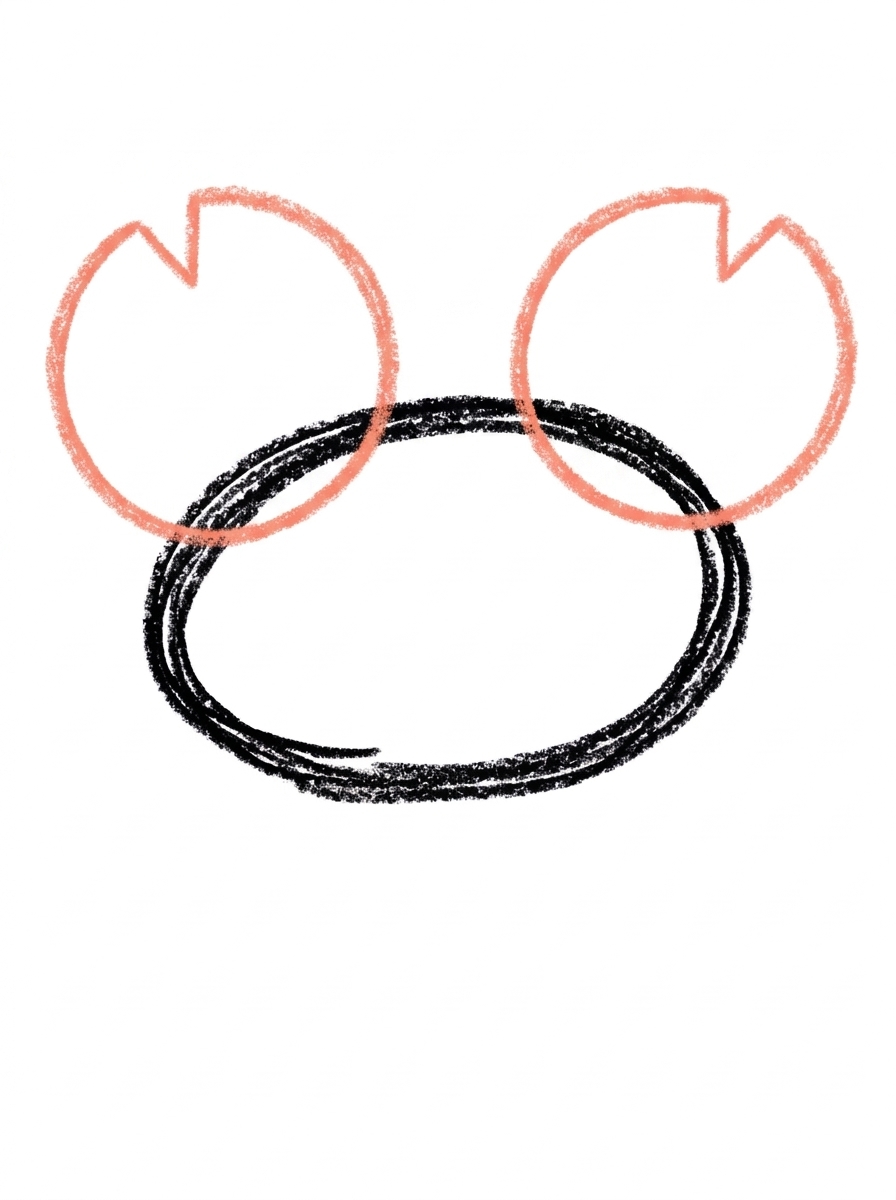
Draw one big circle on the top-left of the body and one on the top-right, each with a small triangle notch cut out of its top. Those are the claws.
Step 3: The Eyes
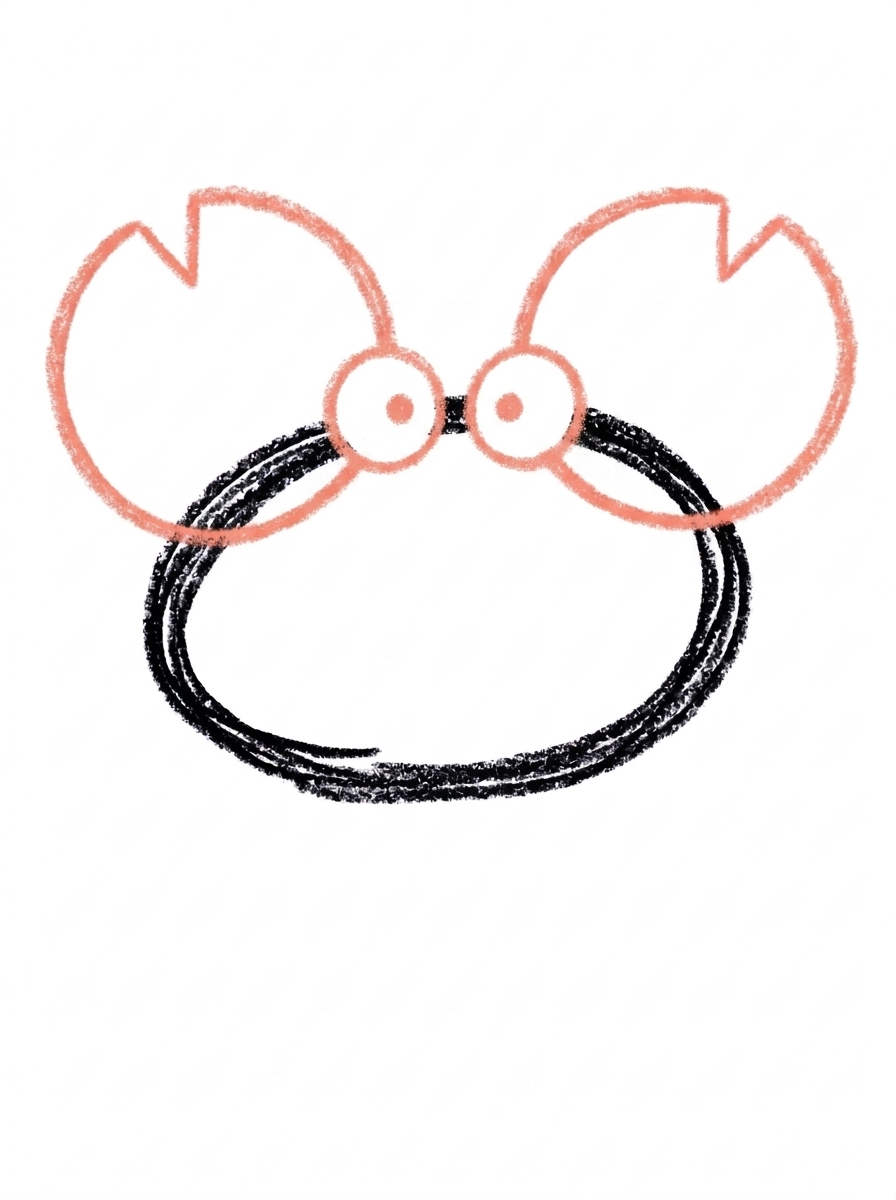
Draw two small circles side by side on top of the body, with a dot in the middle of each one. Those are the eyes.
Step 4: The Left Legs
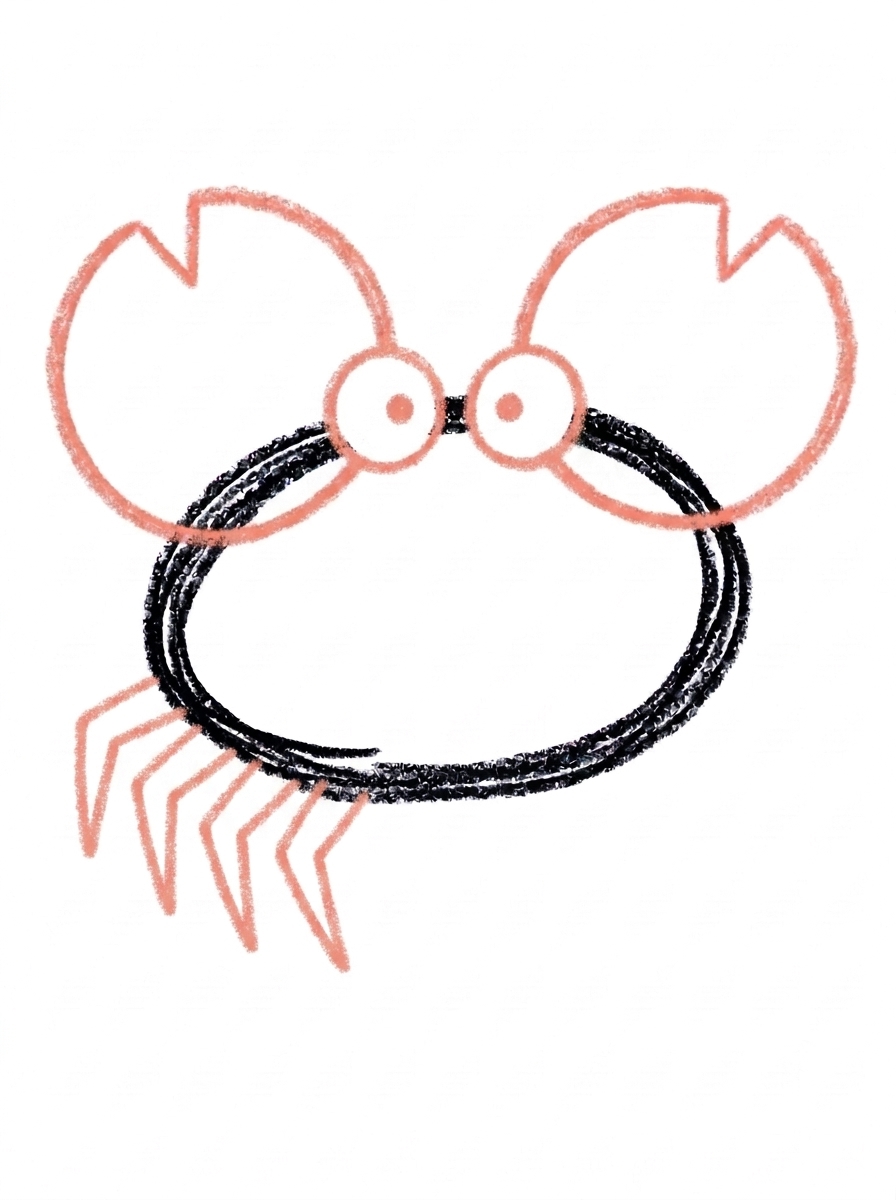
Draw four pointy bent legs hanging from the bottom-left of the body.
Step 5: The Right Legs
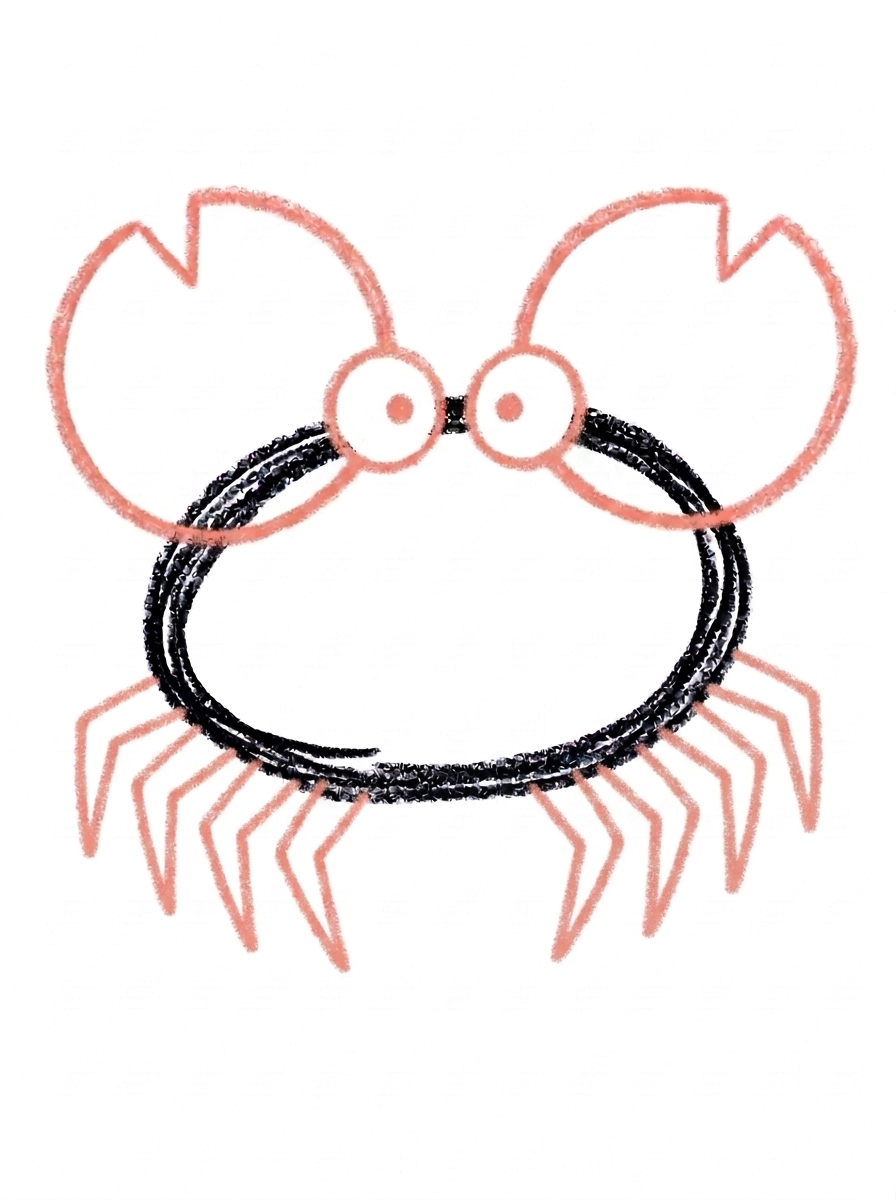
Draw four more pointy bent legs on the bottom-right. Crabs have eight walking legs — four on each side — plus their two claws!
Step 6: Color It In
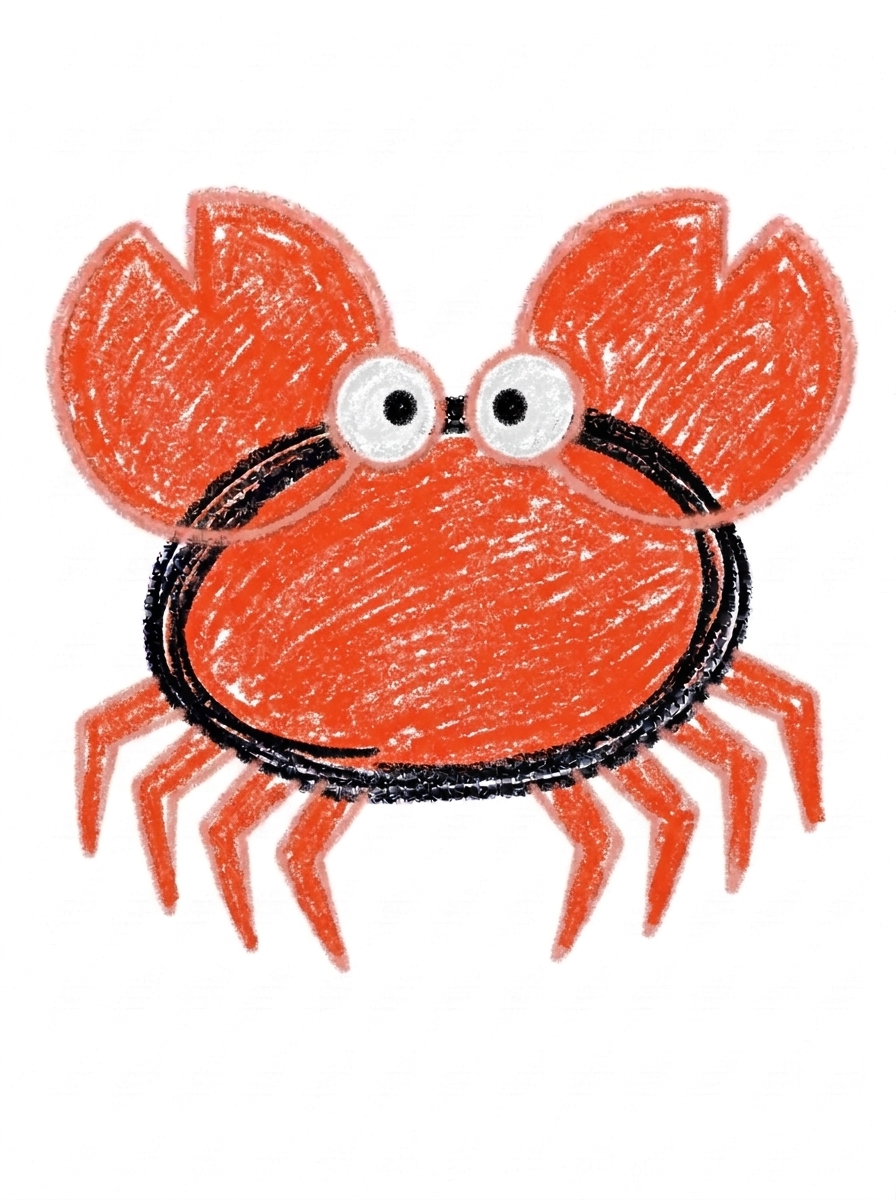
Color the body, claws and legs bright red-orange. Make the eye circles white and the dots in them black. Great drawing!
📊 Crab Drawing by Age
Every age can join in — just adjust the job.
| Age | What they can do | Tip |
|---|---|---|
| 3-4 | Draw the wide oval body and color the finished crab in bright red-orange. | Start the oval in the middle of the page — the claws need room at the top corners and the legs need room underneath. |
| 4-5 | Add the two big claw circles with their triangle notches and the two eye circles with dots. | Draw both claws before adding the notches, so the pair comes out roughly the same size. |
| 6+ | Finish all six steps, including counting out four pointy bent legs on each side. | Let older kids count the legs out loud as they draw — eight walking legs plus two claws is a fun real-crab fact to check off. |
🖨️ Download Your Free Crab Drawing Printable
The printable lays out all 6 steps one per box, big enough for little hands — kids draw right alongside each step.
⬇️ Open Free Printable 🖨️ Print🎁 Free printable for ages 3+
🦀 Crab Beach Page
Give your crab a beach to live on: draw wavy water along the bottom of the page, a sandy shore, and a few shells or star shapes around it, then decide together who this crab is — a grumpy crab who pinches toes, a friendly crab who waves at swimmers, or a tiny crab with a very big shell collection. Write one sentence about the crab under the drawing (or dictate it for a grown-up to write) and the picture becomes a story your child can keep telling.
What You'll Need to Draw A Crab
All you need is a pencil, an eraser, and crayons or markers. For the colors in the tutorial, have bright red-orange ready for the body, claws, and legs, white for the eye circles, and black for the eye dots. Regular printer paper or a sketchbook both work.
What They're Learning
This tutorial practices wide ovals (the body), circles with a triangle notch (the claws), and repeated pointy bent lines for the legs — great zigzag practice. Kids also work on real counting (four legs per side, eight in total, plus two claws), left-right symmetry, and the sequencing habit of finishing one side before starting the other.
Make It Yours
Try a purple or rainbow crab just for fun, a tiny baby crab beside this one using the same steps drawn smaller, a smiling crab by adding a small curve under the eyes, or a whole crab family marching across the page in a line. A crab holding a beach ball in one claw — one extra circle — makes a fun summer card.
🛒 Our Favorite Drawing Supplies
These are the supplies we reach for in our own home — washable (because kids), quality paper, and enough colors to avoid fights.
As an Amazon Associate, MomYouNeedThis earns from qualifying purchases — at no extra cost to you.
💡 Crab Drawing Tips for Parents
Steps 4 and 5 are mirror images of each other, and that's where kids most often lose count. Have your child touch each leg with their pencil as they finish it — one, two, three, four — then flip to the other side and match it. If a side ends up with three or five legs, it's a crab with character, not a mistake worth erasing.
The claw notch in step 2 is the one fiddly detail: draw the full circle first, then the small triangle bite at the top. If the triangle lands off-center, the claw just looks like it's waving. Keep the two eye circles in step 3 small — big eyes on top of the body can crowd the claws at the corners.
✏️ Crab Drawing Step by Step
A crab looks complicated from the side — all those legs, plus claws — but from the front it's one of the friendliest shapes in the ocean. This tutorial draws the crab facing you, so everything is arranged in a tidy, symmetrical stack that young kids can follow: body in the middle, claws up top, legs hanging below.
The wide oval body goes down first and anchors everything. The claws attach at its top corners, the eyes sit right on top of it, and the legs hang from its bottom edge. There's never a moment of guessing where a part belongs, because every part touches the body.
Work through the steps in order and let your child check each one against the picture before moving on. That checking habit — draw, compare, continue — is the real skill underneath every drawing tutorial, and a crab's clear left-right layout makes it easy to practice.
See free crab printable for more.
✏️ One Shape Per Step, Six Steps Total
The order is deliberate: step 1, one wide oval body, a little flatter on the bottom; step 2, two big claw circles at the top corners, each with a small triangle notch; step 3, two small eye circles side by side on top of the body, each with a dot in the middle.
Steps 4 and 5 split the legs by side: four pointy bent legs hang from the bottom-left of the body, then four matching legs on the bottom-right. Splitting them keeps each step small and gives kids a natural counting moment — four plus four makes the crab's real total of eight walking legs. Step 6 colors the body, claws, and legs bright red-orange, with white eye circles and black dots.
Nothing here needs a perfect circle or a straight line. Wobbly legs just look like a crab mid-scuttle, and uneven claws give the crab a personality — one big claw and one small one is something real crabs actually have.
See free crab printable for more.
🦀 Cute Crab Drawing
What makes this a cute crab drawing instead of a spiky one? The front-facing layout and the round shapes. The body is a soft wide oval, the claws are plump circles, and the eyes are two friendly dots-in-circles sitting on top like a cartoon character waving hello.
You can push the cuteness further at coloring time: rosy cheeks under the eyes, a smile curve along the front of the body, or a polka-dot pattern on the shell. A baby crab also works beautifully — repeat the same steps smaller, with bigger eyes compared to the body.
Keeping the crab friendly matters for little ocean lovers who find real crab photos a bit much. This is a crab who can star in beach stories, wave from a greeting card, and get colored purple without anyone feeling the picture is 'wrong.'
See free crab printable for more.
❓ Crab Drawing FAQs
What is the easiest way to draw a crab?
Start with one wide oval for the body, then build on it one shape at a time: two big claw circles with a triangle notch, two eye circles on top, four pointy legs on the left, and four on the right. The six steps turn a 'hard' crab into a stack of easy shapes.
What age is this crab drawing for?
It's made for ages 3 and up. The shapes are all preschool-friendly — ovals, circles, and zigzag legs — and younger kids can do the body and coloring while older kids add the claw notches and count out all eight legs themselves.
What supplies do we need?
A pencil, an eraser, paper, and crayons or markers. For colors you'll want bright red-orange for the body, claws, and legs, white for the eye circles, and black for the eye dots.
Is the printable really free?
Yes — every printable on MomYouNeedThis is 100% free, including this crab drawing tutorial. There is no signup, no email, and no catch — just download, print, and draw.
How do I print it?
Open the PDF and choose Print, then set the scale to 100% (sometimes called Actual Size) so the steps print at full size. The tutorial is designed for regular US Letter paper, and plain printer paper works perfectly.
Does the crab really have eight legs?
Yes — real crabs have eight walking legs, four on each side, plus two claws. This tutorial keeps the real count, and steps 4 and 5 are split left and right so kids can count the legs as they draw them.
How do I draw the crab's claws?
Each claw is one big circle at the top corner of the body with a small triangle notch cut out of its top edge. Draw the circle first, then add the little triangle bite — that notch is what turns a plain circle into a pincer.
Where do the crab's eyes go?
They sit on top of the body, not on stalks or inside the face area. Draw two small circles side by side along the body's top edge, with one black dot in the middle of each — simple, friendly, and easy for little hands.
📚 Keep Exploring
- ✏️ All 74 Drawing Tutorials 74 free step-by-step drawing tutorials for kids.
- 🌊 Ocean Coloring Free ocean coloring pages for kids.
- ✏️ Drawing Practice Free printable drawing pre-writing worksheet for toddlers.