 🦜 FREE PARROT DRAWING
Parrot Drawing for Kids How to Draw A Parrot in 6 Easy Steps
Quick Answer
Draw a parrot in six easy steps: a plump oval body, a round head with a big eye, a hooked beak, a long wing, and two tail feathers with little feet. Color it bright green with a blue wing and orange beak. Made for ages 3 and up — no signup, just print.
At a Glance
- Subject: How to draw a parrot
- Ages: 3+
- Steps: 6 steps
- Time: ~15 min
- Difficulty: Easy
- Supplies: Paper, crayons
Parrots are pure color, but the drawing underneath them is simple — a plump body, a round head, and one big hooked beak that does all the talking. This one sits in side view, so kids only need one eye and one wing.
✏️ Draw Your Parrot in 6 Easy Steps
One step per box — this step by step parrot drawing shows each new part in a different color so kids can see exactly what changed.
Step 1: The Body
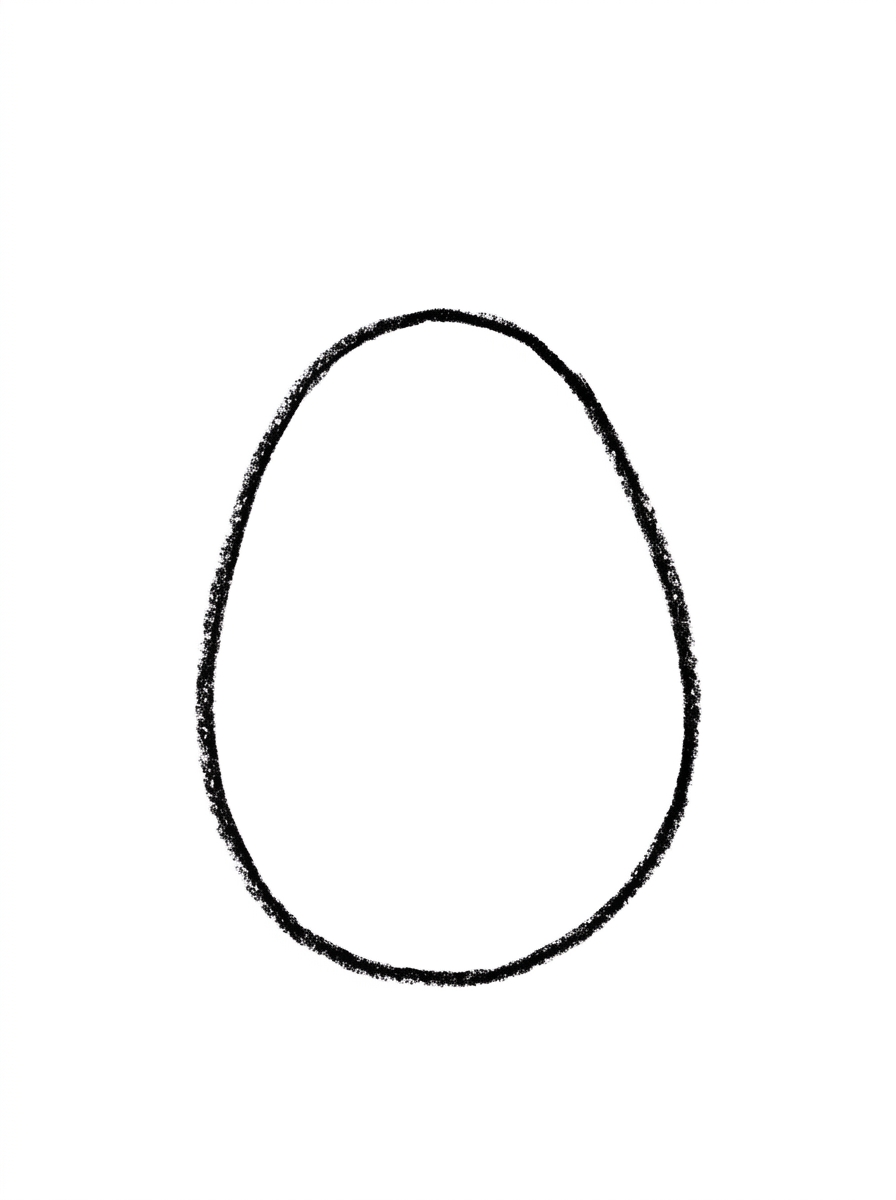
Draw one plump upright oval, a little tilted and wider at the bottom — that's the parrot's body.
Step 2: The Head and Eye
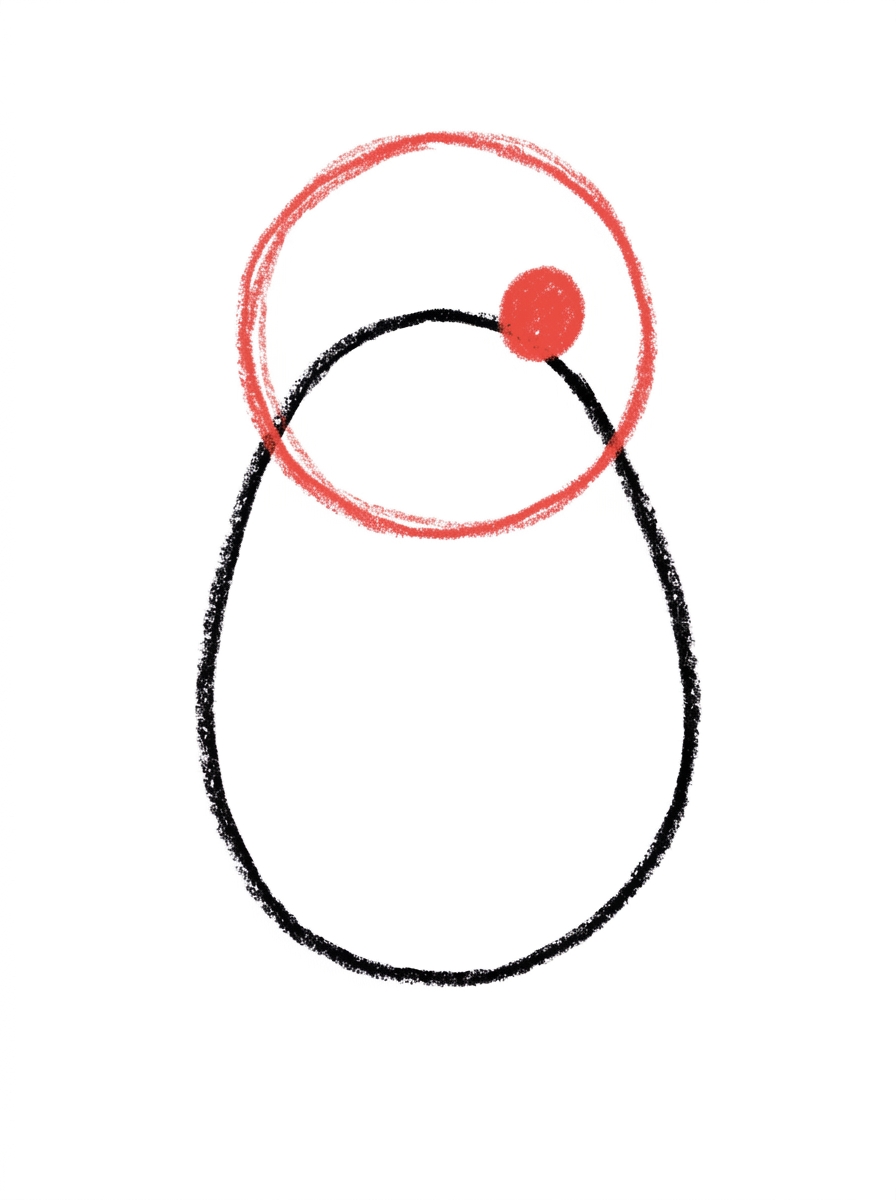
Add a circle overlapping the top of the body for the head, with one big dot on the front half for the eye.
Step 3: The Beak
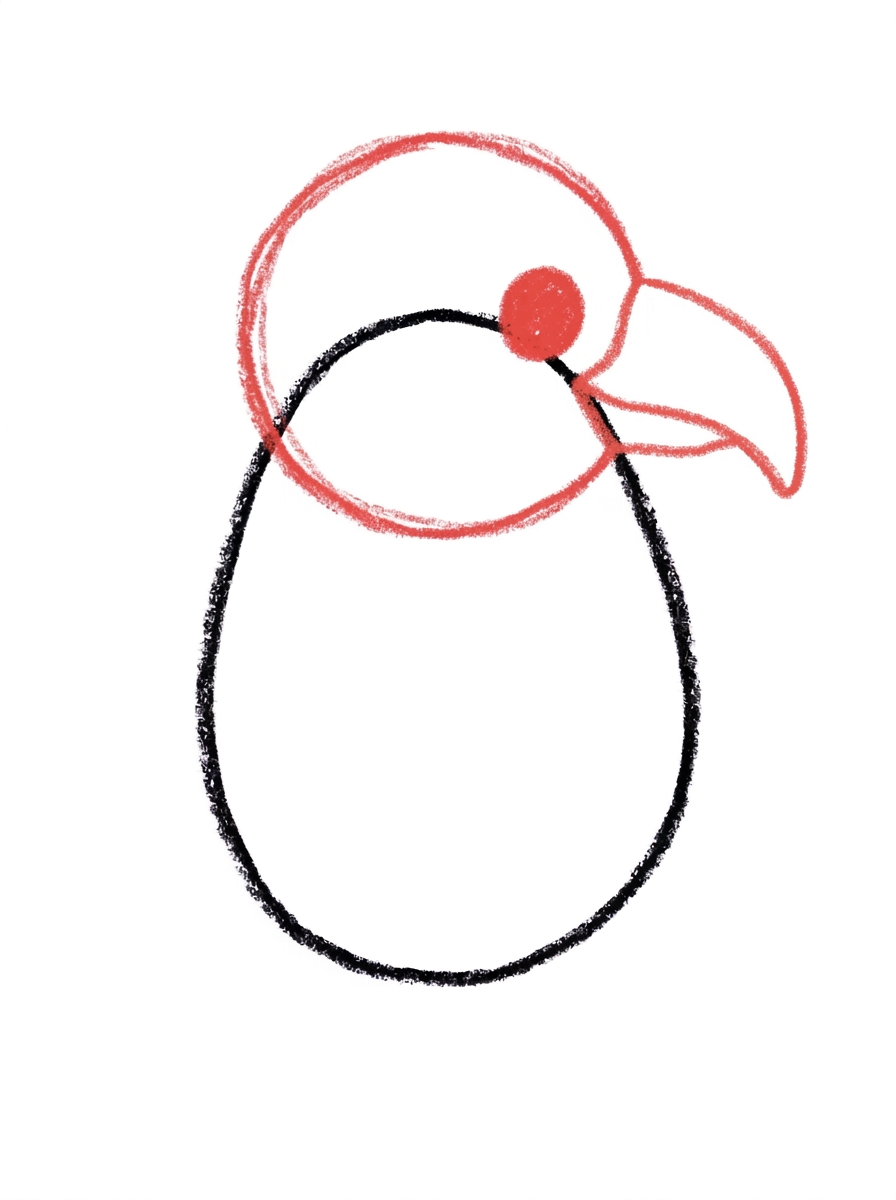
Draw one big hooked beak on the front of the head, curving out and down to a rounded point.
Step 4: The Wing
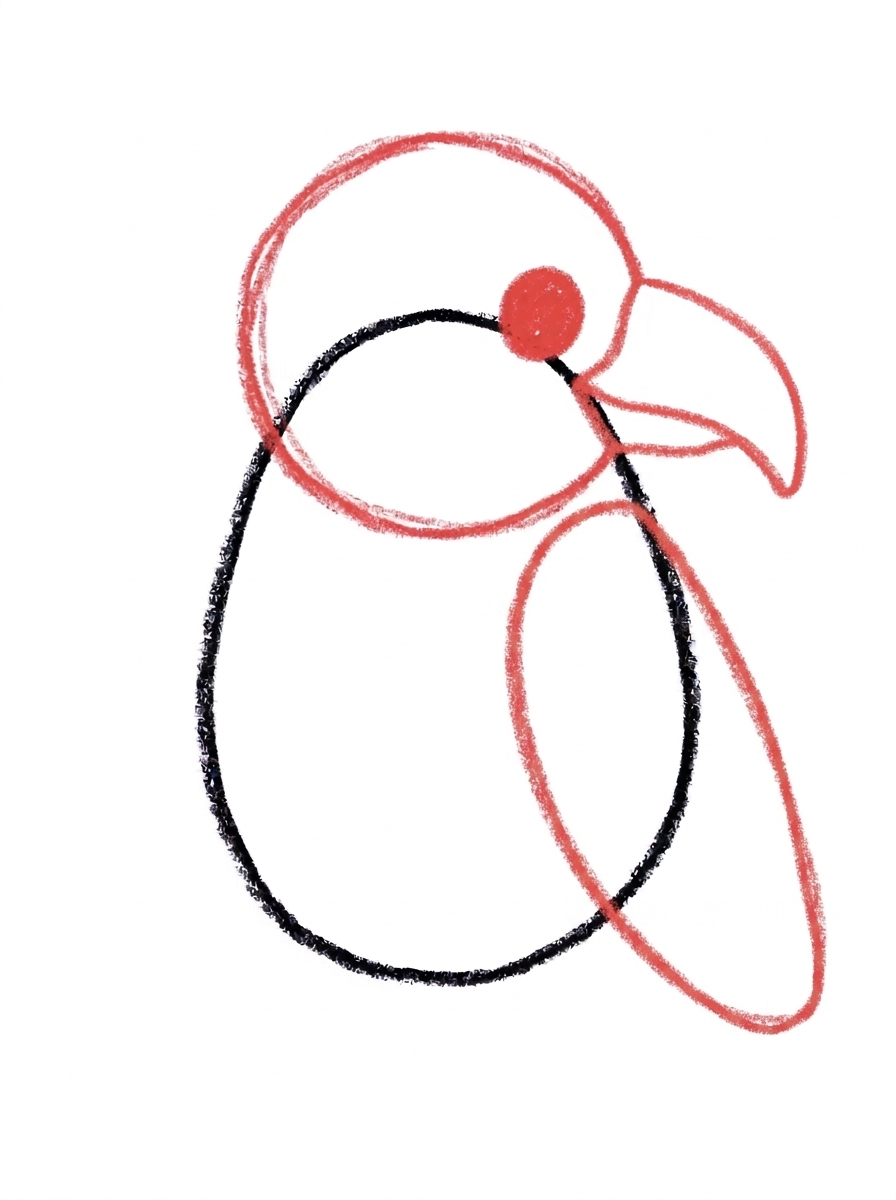
Draw one long rounded wing lying along the side of the body, from the middle down to the lower part.
Step 5: The Tail Feathers and Feet
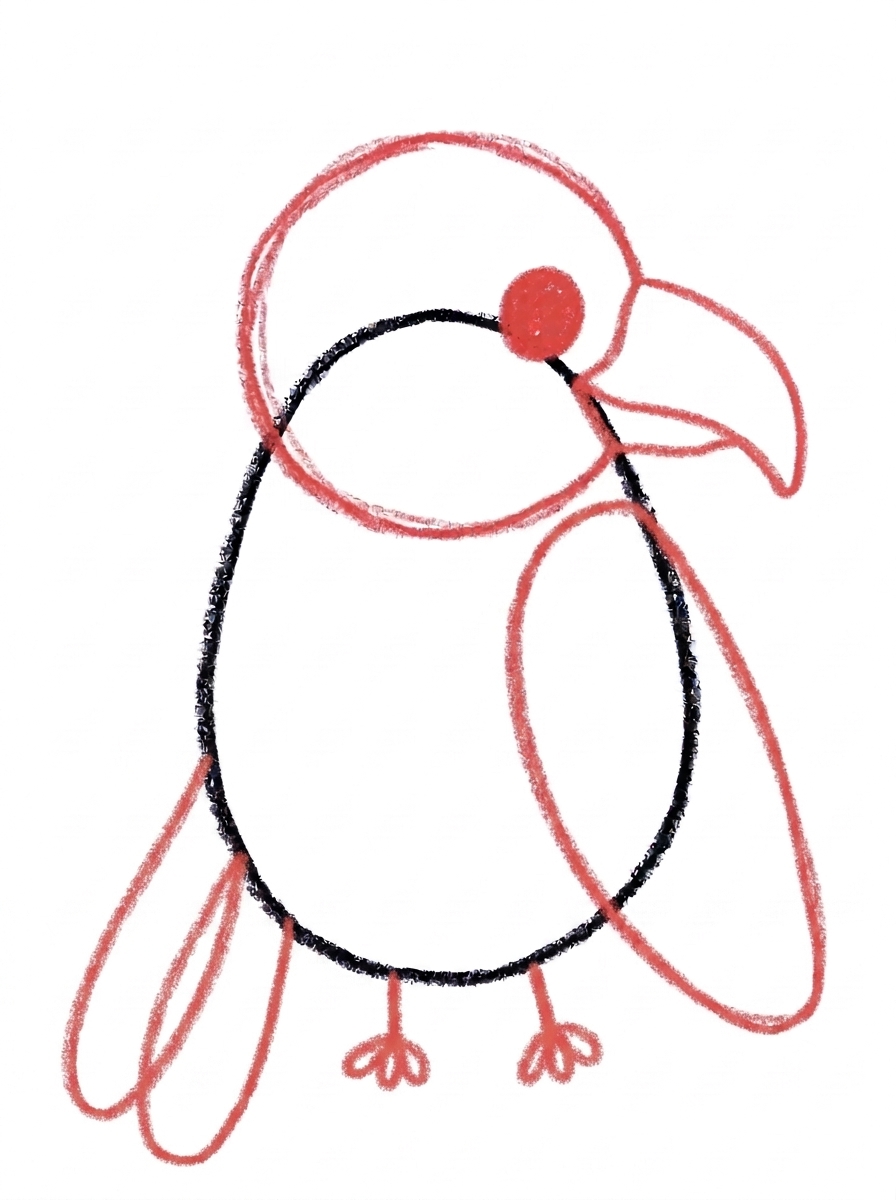
Add two long tail feathers hanging down side by side from the bottom of the body, and two small feet with tiny toes under the front.
Step 6: Color It In
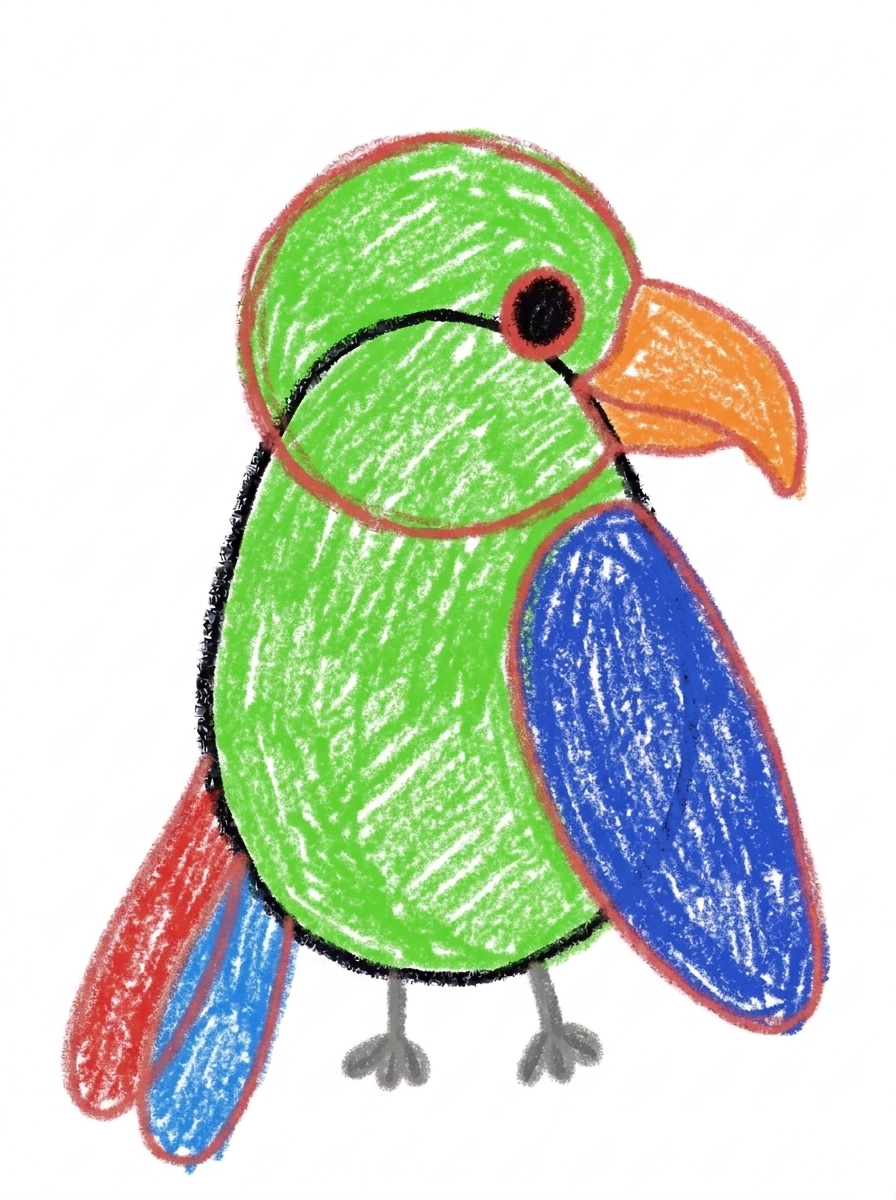
Color your parrot! Bright green for the body and head, royal blue for the wing, an orange beak, one red tail feather and one blue, and gray feet. Great drawing!
📊 Parrot Drawing by Age
Every age can join in — just adjust the job.
| Age | What they can do | Tip |
|---|---|---|
| 3-4 | Draw the plump body oval and color the finished parrot bright green. | A slight tilt makes the body feel like a perched bird — upright and stiff reads as a penguin instead. |
| 4-5 | Add the head with its big eye, the hooked beak, and the long wing down the side. | The beak goes out first, then hooks down — say 'out and down' while they draw it and the hook lands. |
| 6+ | Finish all six steps, including the two long tail feathers and the two small feet with tiny toes. | Let older kids draw the tail feathers extra long — parrot tails are dramatic, and longer reads better. |
🖨️ Download Your Free Parrot Drawing Printable
The printable lays out all 6 steps one per box, big enough for little hands — kids draw right alongside each step.
⬇️ Open Free Printable 🖨️ Print🎁 Free printable for ages 3+
🦜 Parrot Talk Page
Parrots talk, so give yours something to say: draw a branch under its feet to perch on, a few big jungle leaves in the corners, and a speech bubble beside its beak with a word inside — 'Hello!' is the classic. Then decide together what this parrot has been listening to: pirate phrases, the family's morning routine, or the dog's name called over and over. Write one sentence about the parrot under the drawing (or dictate it for a grown-up to write).
What You'll Need to Draw A Parrot
All you need is a pencil, an eraser, and crayons or markers. For the colors in the tutorial, have bright green ready for the body and head, royal blue for the wing, orange for the beak, red and blue for the two tail feathers, and gray for the feet. Regular printer paper or a sketchbook both work.
What They're Learning
This tutorial practices profile drawing — showing an animal from the side with one eye and one wing — plus a controlled hook curve for the beak and long parallel lines for the tail feathers. Kids also plan two-tone coloring (one red feather, one blue) and add small precise details like toes at a tiny scale.
Make It Yours
Try scarlet macaw colors (red body, blue and yellow wing), a blue-and-gold macaw, a branch perch with jungle leaves, or a whole row of parrots on one branch colored like a rainbow. A crest of feathers on the head turns it into a cockatoo cousin.
🛒 Our Favorite Drawing Supplies
These are the supplies we reach for in our own home — washable (because kids), quality paper, and enough colors to avoid fights.
As an Amazon Associate, MomYouNeedThis earns from qualifying purchases — at no extra cost to you.
💡 Parrot Drawing Tips for Parents
Step 3's beak decides the drawing. The common slip is a small triangle beak, which turns the parrot into a songbird. Coach the two-part move — out from the face first, then hook down to a rounded point — and let the beak be big. If the first beak comes out small, draw a second, bigger one right beside the picture so your child can feel the difference in size.
Reassure kids about the single eye before step 2: side-view animals show one eye, and that's correct, not a shortcut they're 'getting away with.' At step 5, the tail feathers should hang well below the body and stay side by side like two ribbons — long is right, and slightly uneven lengths look natural.
✏️ Parrot Drawing Step by Step
This parrot is drawn in profile, and that's a deliberate kindness to young artists: from the side, a bird needs only one eye, one wing, and one beak, and everything stacks along one clear outline. There's no guessing about what goes on the far side of the body.
The beak is the step that makes it a parrot rather than a generic bird. Lots of birds have beaks; only parrots (and their hook-billed cousins) have that big curve that comes out and hooks down. Spend the extra minute there and the species is unmistakable.
Work through the steps in order and let your child check each one against the picture. The tail feathers at step 5 change the bird's whole balance — two long feathers hanging below the body turn a round bird into a long, elegant parrot shape.
See free parrot printable for more.
✏️ One Shape Per Step, Six Steps Total
The order is deliberate: step 1, the plump upright body, a little tilted and wider at the bottom; step 2, the head circle overlapping the top of the body with one big eye dot on its front half; step 3, the big hooked beak curving out and down to a rounded point.
Step 4 lays one long rounded wing along the side of the body, from the middle down to the lower part. Step 5 adds two long tail feathers hanging side by side from the bottom of the body and two small feet with tiny toes under the front. Step 6 colors it bright green with a royal blue wing and an orange beak, one tail feather red and the other blue.
The two-tone tail is a nice detail to point out before coloring: one red feather, one blue. It teaches kids to color with a plan — decide which feather gets which color before the crayon starts moving.
See free parrot printable for more.
🦜 A Parrot in Profile
Profile drawings have a long history in kids' art because they trade a little realism for a lot of clarity. This parrot's single big eye, placed on the front half of the head, looks toward the beak — and that direction is what makes the bird feel alert and alive rather than decorative.
The wing lies flat along the body like a long teardrop, the way a resting parrot's folded wing actually looks. And the gray feet with tiny toes under the front of the body ground the bird, ready to grip a perch your child can draw in.
If the finished outline reads 'parrot' before any color — and with that beak, it does — then the famous parrot colors are pure reward at step 6, not a rescue mission.
See free parrot printable for more.
❓ Parrot Drawing FAQs
What is the easiest way to draw a parrot?
Draw the parrot from the side: a plump oval body, a round head, and one big hooked beak are most of the bird. Add one long wing, two long tail feathers, and two little feet, and the parrot is done — the bright colors at the end do the rest.
What age is this parrot drawing for?
It's made for ages 3 and up. Younger kids can draw the body, head, and coloring, while older kids add the beak curve, wing, tail feathers, and feet themselves.
What supplies do we need?
A pencil, an eraser, paper, and crayons or markers. For colors you'll want bright green, royal blue for the wing, orange for the beak, red and blue for the tail feathers, and gray for the feet.
Is the printable really free?
Yes — every printable on MomYouNeedThis is 100% free, including this parrot drawing tutorial. There is no signup, no email, and no catch — just download, print, and draw.
How do I print it?
Open the PDF and choose Print, then set the scale to 100% (sometimes called Actual Size) so the steps print at full size. The tutorial is designed for regular US Letter paper, and plain printer paper works perfectly.
Why does the parrot only have one eye?
Because it's drawn from the side — a profile view. We see one side of the bird, so one eye and one wing is correct, the same way a photo of a parrot sitting sideways shows one eye. Side views are a friendly shortcut for young artists.
How do I draw the hooked beak?
Start wide where the beak meets the face, curve it out, then hook it down to a rounded point — like the tip of a banana or a pirate's hook. One smooth curve out and down is the whole trick.
Can my parrot be a different color?
Parrots are the best subject for wild color — real ones include the scarlet macaw in red, blue, and yellow, and the blue-and-gold macaw. Any bright combination works; keep the wing a different color from the body so it stands out.
📚 Keep Exploring
- ✏️ All 74 Drawing Tutorials 74 free step-by-step drawing tutorials for kids.
- 🐾 Animal Coloring Free animal coloring pages for kids.
- ✏️ Drawing Practice Free printable drawing pre-writing worksheet for toddlers.